Chana Dal - Yellow Split Pea Curry

Yellow-split-pea-dahl-web-2.jpg

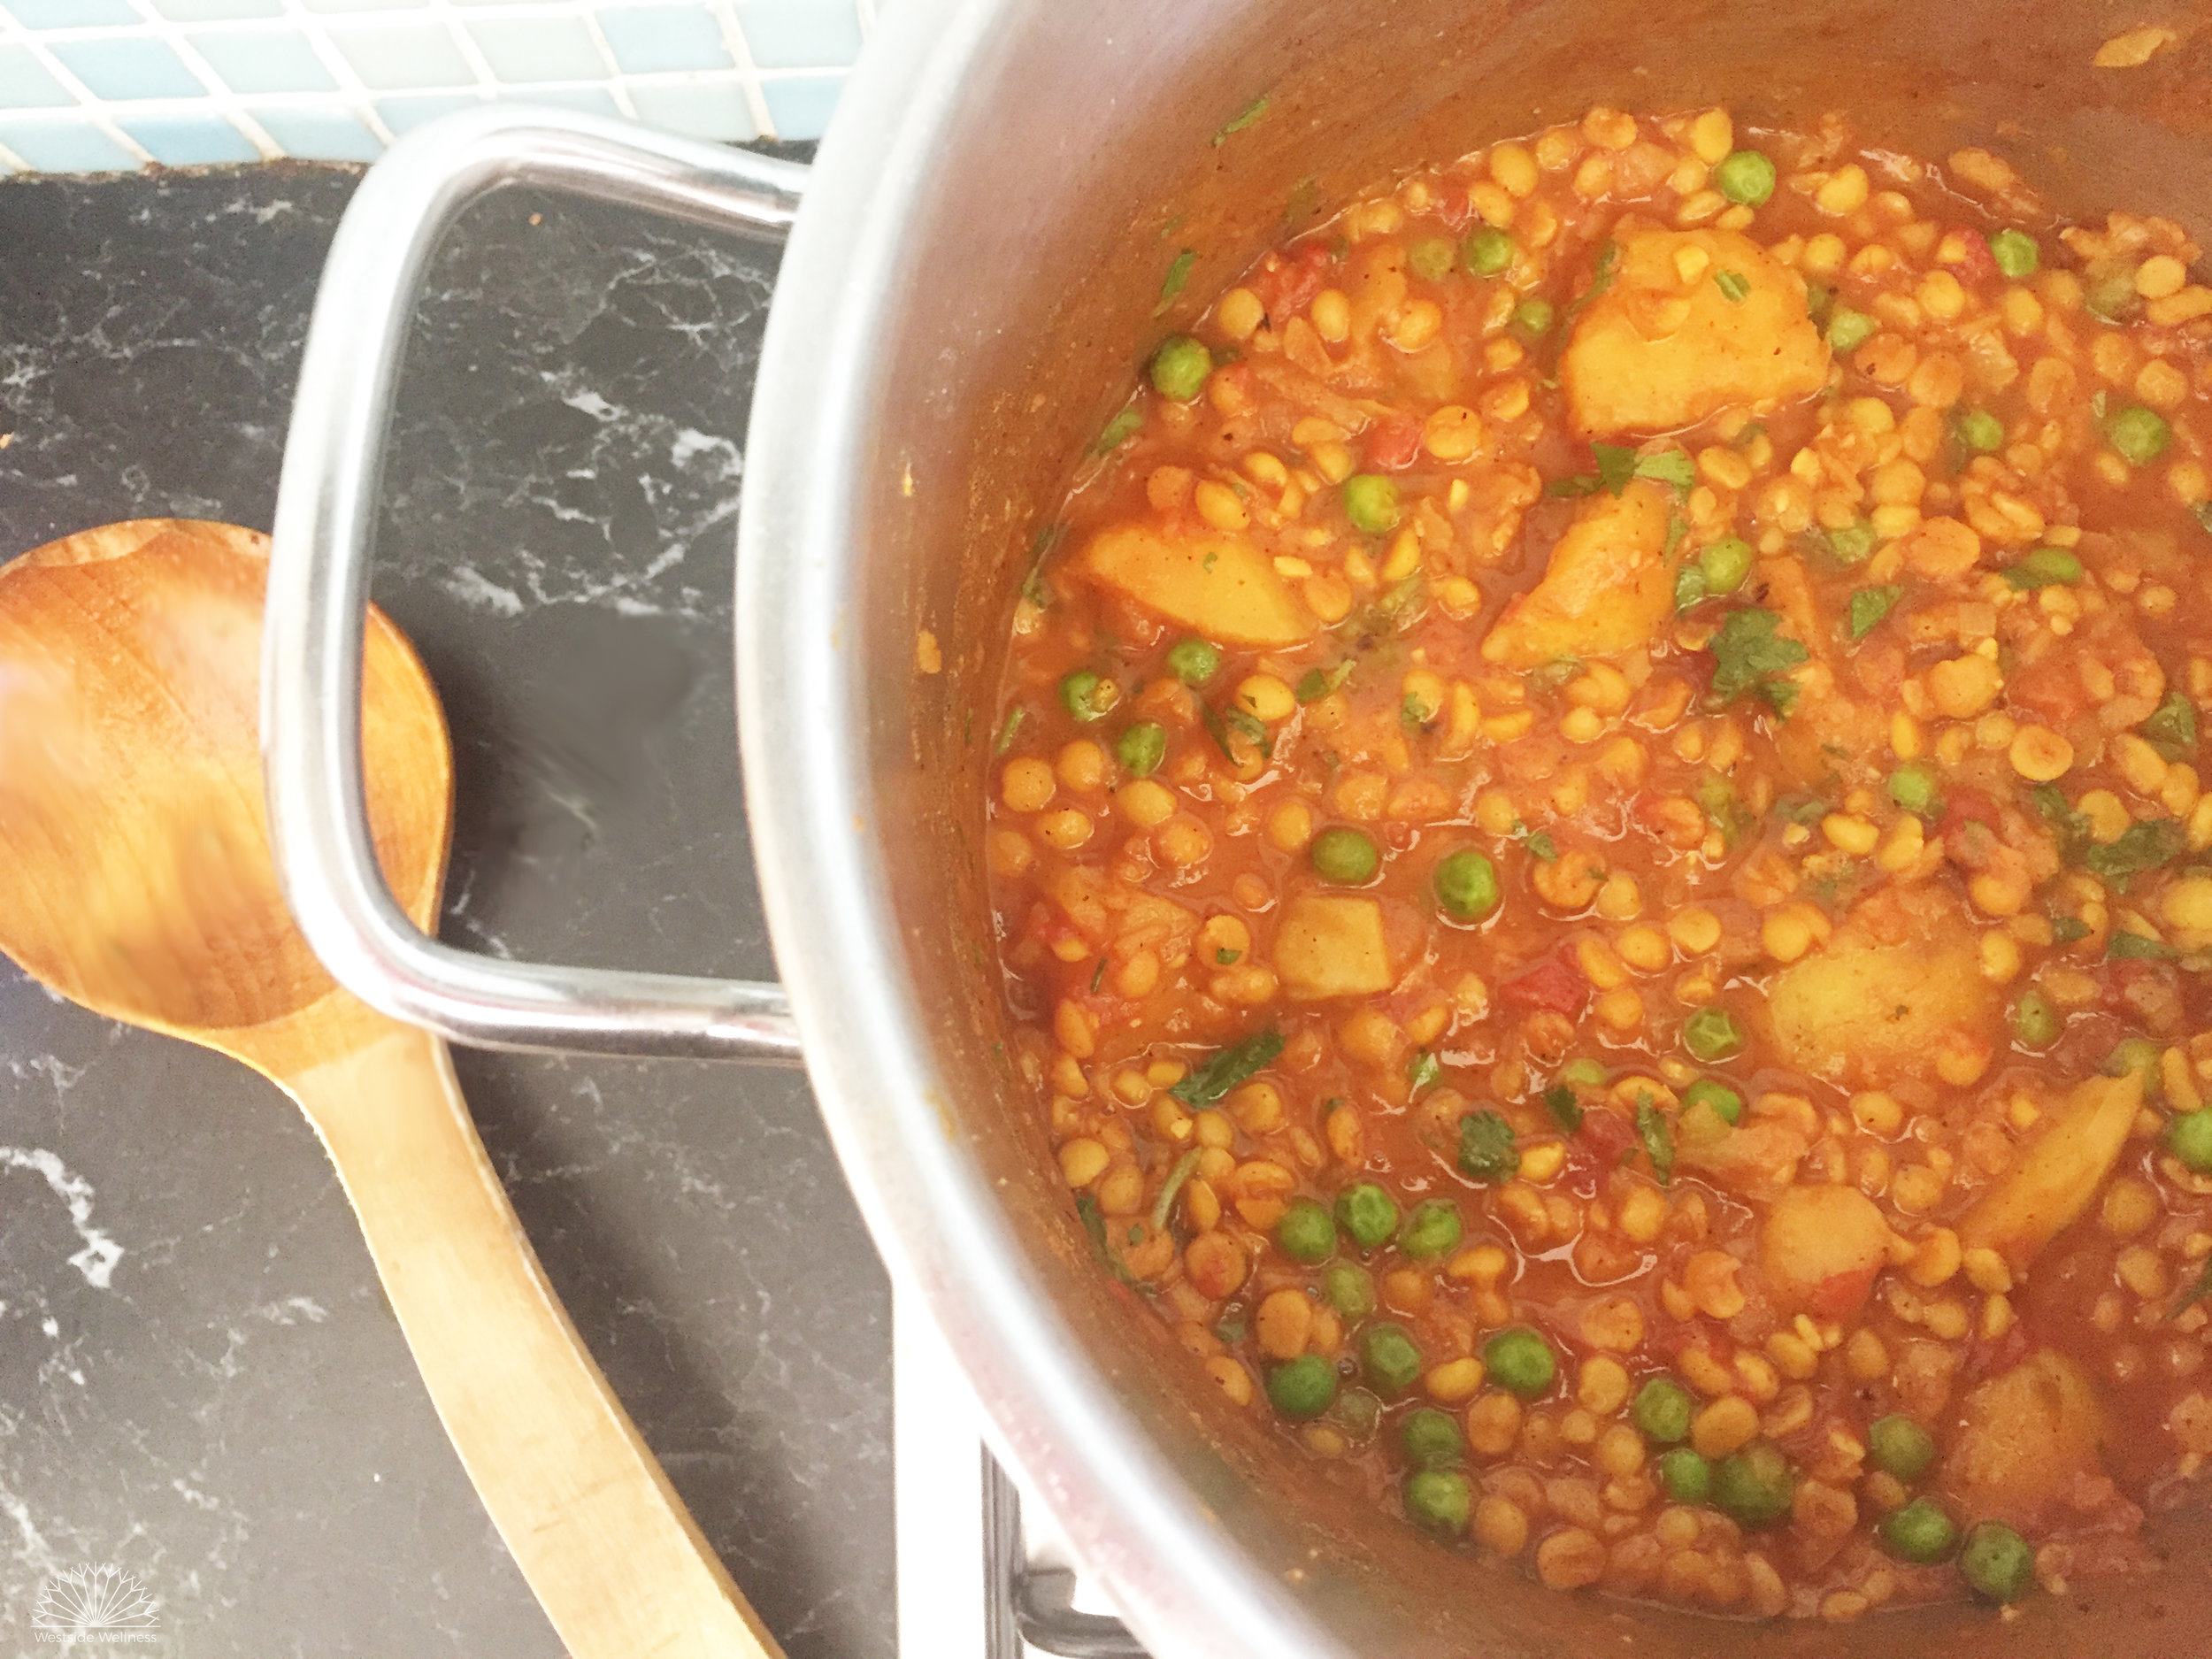
At Westside Wellness we could live on curry forever!! Chana dal is a nutrient dense, fast, easy and budget-savvy meal. I cook it at least once a fortnight. The kids love it and it has mild and simple favours as far as curry goes. You can always swap the frozen peas for a handful of fresh spinach leaves to brighten the meal up. 

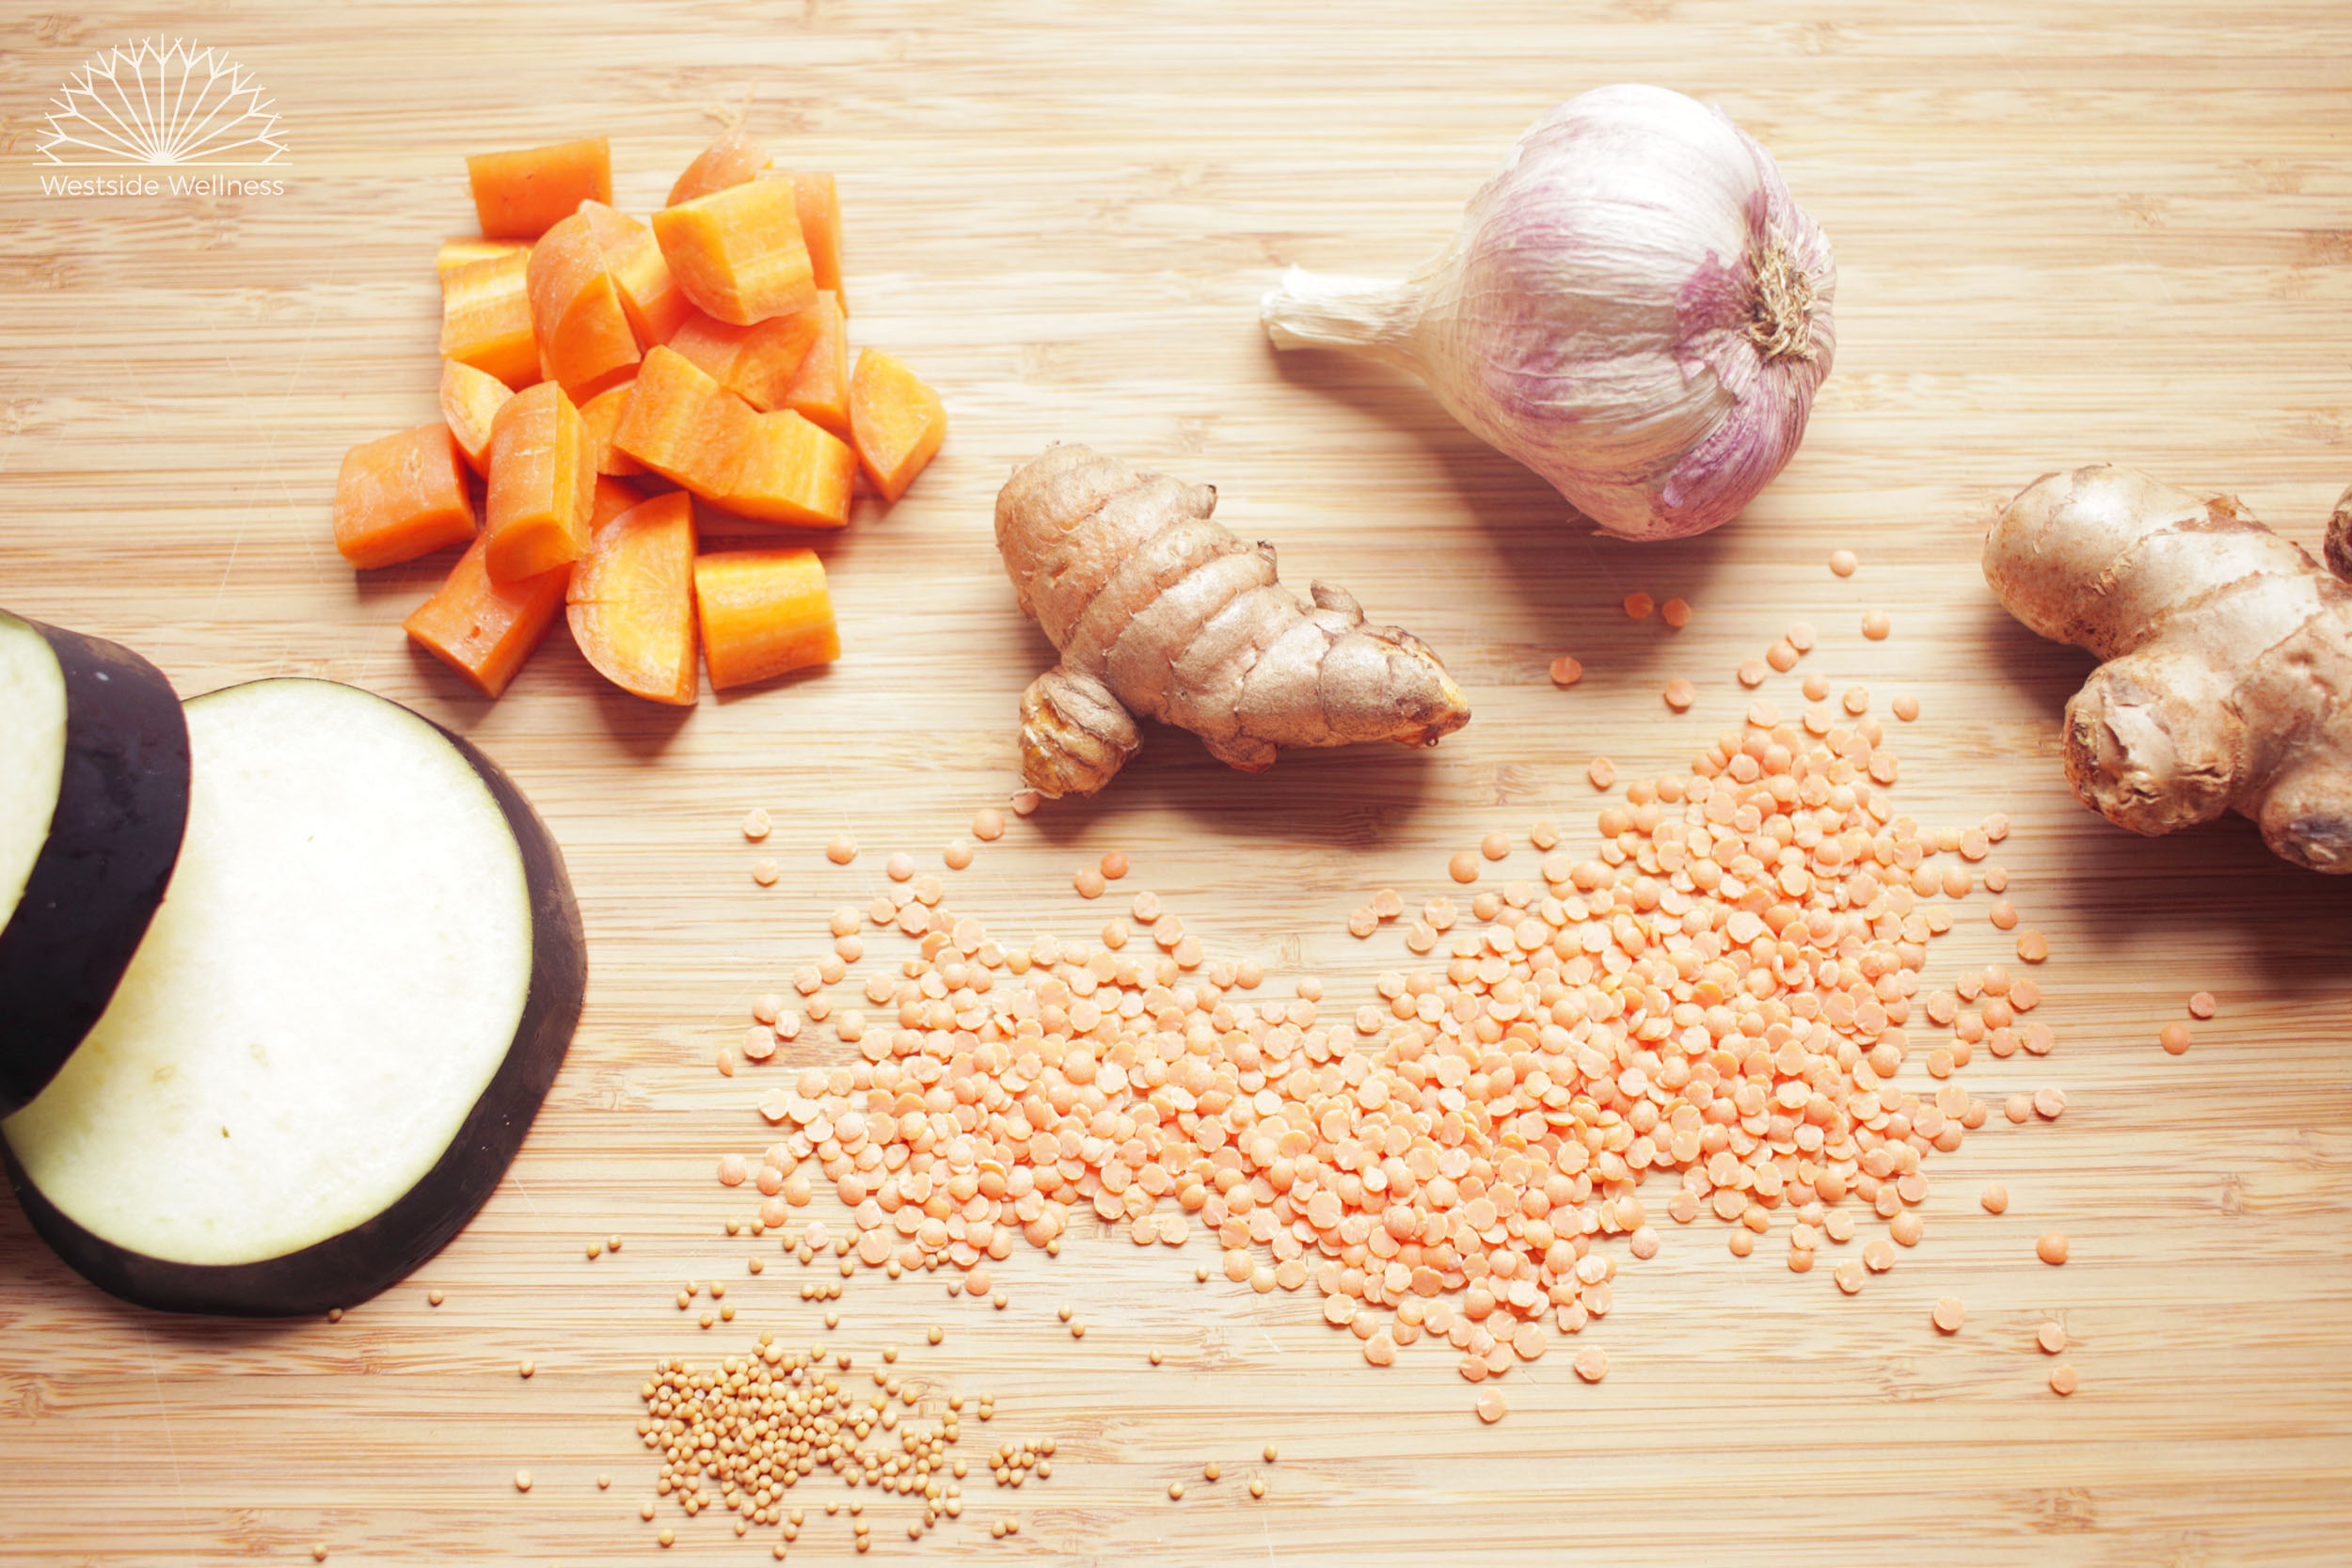
Chana dal is made with split yellow peas - these legumes are packed full of fibre, carbohydrate, protein (including tryptophan, the precursor to our happy hormone - serotonin) and other minerals and vitamins. Yellow split peas contain both soluble and insoluble fibre which helps to keep your bowels regular, balance your blood sugar and cholesterol levels. And best of all - they are really filling! A cup of organic yellow split peas costs only $3 - so it's also an easy way to fill the family up when you are shopping on a budget!

Ingredients

  • 1 tbs extra virgin coconut oil
  • 500gm desiree or nicola potato, washed and chopped into large bite-sized chunks
  • 1 cup of yellow split peas, rinsed thoroughly
  • 1 brown onion, diced
  • 1 clove of garlic, chopped
  • 1 chunk of fresh ginger, grated (about the size of your thumb)
  • 1 tbs garam masala
  • 1 heaped tsp of turmeric powder
  • 1 tsp fenugreek powder (optional)
  • 1 tsp cumin powder
  • 1 x 400g can of tinned tomato (or 4 medium sized diced fresh tomatoes)
  • 1 tsp of tomato paste
  • 1 tbs stock paste (or stock powder)
  • 400mL water (or swap the stock past and water for bone broth).
  • 1 x 400mL can of full fat coconut cream (alternatively you can make your own)
  • 1 x cup of frozen peas 
  • Juice of 1 lime
  • Half a bunch of coriander, chopped

Method

  1. Wash the yellow split peas and leave to soak for as long as you can (up to 12 hours)
  2. Melt the coconut oil in a large pot on medium heat until shimmering, then add the onion.
  3. Once the onions start to soften (about 4 minutes) add the garlic, ginger, garam masala, turmeric, fenugreek and cumin powder. 
  4. Allow the spices to coat to the onions and the garlic and ginger to cook gently.
  5. Strain the yellow split peas and add them along with the potatoes to the onion mixture.
  6. Once the potatoes and peas are all coated in the spices then add the tomato paste, chopped/tinned tomatoes, stock paste/powder and water.
  7. After bringing the pot to the boil, add the coconut cream and quickly turn to the lowest heat.
  8. Simmer for 35 minutes, stirring the pot regularly to prevent the peas and potatoes from sticking to the pot.
  9. Add the peas and cook for another 8 minutes.
  10. Serve with chopped coriander and fresh lime juice. You can serve with cooked brown rice, quinoa or cauliflower rice to stretch the meal further.
Yellow-split-pea-dahl.jpg


Serves 6


Red Lentil & Veggie Curry

Another favourite of Renee's, this red lentil curry is flavoursome without being too 'spicy' for little ones but also tasty for grown ups. The cooking time helps to break down the veggies (hello hidden veggies!), meaning suspicious kids won't know any better and you will feel good knowing the whole family has eaten a veggie loaded meal.

This curry is great made a couple of days in advance, which allows the flavours to grow, and it freezes and defrosts well. A great one to prep on the weekends for a quick reheat through the week!

red lentil curry web vers.jpg

Serves 4-6
Prep time: 10 mins
Cooking time: 1 hour
Total time: 1 hour 10 minutes

INGREDIENTS

  • 2 tbs toasted sesame oil (you can use olive or coconut oil too)

  • 1 onion, finely chopped

  • 3 cloves garlic, finely chopped

  • 1 inch piece each of fresh ginger and turmeric, finely chopped

  • 1 carrot, cut into 1 cm cubes

  • 1 zucchini, cut into 1 cm cubes

  • 1 medium eggplant, cut into 1 cm cubes

  • 2 tsp mustard seeds

  • 1 cup split red lentils

  • 1 tin crushed tomatoes

  • 1/4 tsp ground cinnamon

  • 1/2 tsp ground fennel seeds

  • 3 tsp ground coriander

  • 2 tsp ground cumin

  • 1/2 tsp salt + pepper to taste

  • 4 cups water (tap or filtered, just not hot)

  • 2 handfuls of finely chopped leafy greens (spinach, silverbeet, kale etc)

red lentil curry veg web vers.jpg

METHOD

  1. Slice the eggplant, sprinkle salt on each slice and leave aside for 5-10 minutes (this helps to remove any bitterness). Then chop into 1 cm cubes.
  2. In a large pot, add the sesame oil and heat over a medium flame. Add the onion and mustard seeds and sauté until translucent, approximately 5 minutes.
  3. Add the garlic, turmeric and ginger and sauté for another 5 minutes, stirring occasionally. 
  4. Add all the veggies and cook for a further 5 minutes, stirring to combine everything well.
  5. Pour in the crushed tomatoes, water and add all of the spices, lentils and salt and pepper and bring to the boil. Drop to a medium flame, place a lid on the pot (3/4 on to allow some air to escape) and cook for 1 hour, stirring occasionally.
  6. Taste and adjust seasonings. Add the chopped leafy greens and stir through. Serve with cooked rice, quinoa, cauliflower rice or toasted flat bread.


red lentil curry bowl web vers.jpg

Vegan Red Velvet Cake with Salted Caramel Ganache

chopped beetroot website ver.jpg

This is one of those hidden veggies, low refined sugar, sweet treats that we love here at Westside Wellness! It's been made for many a tea or birthday party, the ganache can be swapped for icing and it can even be poured into muffin tins for easier portioning.

The recipe is egg, dairy and gluten free so useful for families with intolerances and great for parties where different diets need to be catered to, but you can swap all of those for regular flour and dairy milk if preferred. 

Enjoy!

INGREDIENTS

  • 2 medium beetroots, peeled and chopped into 2 cm cubes

  • ½ cup coconut sugar

  • 1/3 cup coconut oil

  • 1 tsp vanilla extract or essence

  • 2 cups of flour: 1 ½ cups brown rice flour, ¼ cup corn flour, ¼ cup besan (chickpea) flour *

  • ¼ cup cacao

  • 1 tsp bicarb (baking soda)

  • 1 ½ tsp baking powder

  • ¼ tsp salt

  • ¾ cup of plant-based milk **

  • 2 tbs vinegar

METHOD

  1. Preheat oven to 180 degrees.
  2. Add vinegar to milk and set aside.
  3. Place the chopped up beetroot into a small pan and cover with water. Bring to the boil, reduce heat, cover with a lid and simmer for 20-30 minutes. You will need to keep an eye on this, stirring occasionally and adding a bit more water if it starts to dry out. Stab beetroot with a fork or skewer, you want it fairly soft, a bit firm is ok though.
  4. Once beetroot is cooked, puree it until smoothish (it will have a bit of texture to it).
  5. Cream together the pureed beetroot, coconut sugar, coconut oil and vanilla essence.
  6. Add the flour, bicarb, baking powder and salt and process until smooth.
  7. Add the milk and vinegar mix, again processing till smooth (this is quite a runny mixture, do not add more flour).
  8. Pour mixture into a greased cake tin, bang on bench to release any air bubbles.
  9. Bake at 180 degrees for 20-30 minutes. The cooking time will depend on your oven; gluten free cakes tend to cook quicker and will dry out if over cooked. Check with a skewer, if it comes out clean, or with dry crumbs on it, the cake is ready.
  10. Gluten free cakes can be soft and crumbly, allow to completely cool before turning out of tin.

CARAMEL GANACHE INGREDIENTS

METHOD

  1. Using a small saucepan and bowl as a double boiler, half fill the saucepan with water and bring to the boil.
  2. Break up the chocolate and add to the bowl on top, when most of it has melted, add the salt and coconut cream.
  3. Whisk gently until you have a smooth caramel.
  4. Allow to cool for a minute or two, then pour over your cake. You’ll want a plate slightly bigger than the cake to catch the run off.

CHOCOLATE GANACHE INGREDIENTS

  • 2 tbs coconut oil

  • 1 tbs coconut paste (I use loving earth)

  • 2 tbs rice malt syrup

  • 1 ½- 2 tbs cacao powder (use less or more depending on how strong you’d like the chocolate flavour)

METHOD

  1. Melt the coconut oil and coconut paste over a gentle heat.
  2. Once melted, add the rest of the ingredients and whisk together until smooth
  3. Remove from heat and continue whisking, allowing the mix to cool slightly
  4. Spread over cooled cake and caramel ganache. As the mixture cools, it will firm up more. If you store the cake in the fridge, it will get a whiteish sheen, this is just the coconut oil and will go away once the cake is at room temp.

* You can use any combo of gluten free flours, this is the combination that I’ve found works best, but you could probably use just brown rice and corn flour if you don’t have besan. Regular wheat or spelt flour also work great

** Any plant based milks will work, as will regular dairy milk


website version slice cake.jpg
Batman beetroot cake.jpg

Orange Coconut Deodorant

Homemade deodorant is actually simple to make. It takes less than 3 minutes to whip up a batch....but best of all it actually works!! I had tried crystals, natural roll on, alcohol based and all sorts but this has been the only product that keeps both the sweat and the stink away.

All you need to do is source a few ingredients and store them in the cupboard ready to bring out when you need to make some more up.

INGREDIENTS

  • 3 heaping tablespoons of coconut oil
  • 3 tbs arrowroot powder (or cornstarch)
  • 1 tbs baking soda (I like this brand)
  • 20 drops of orange essential oil (or an essential oil scent you prefer)
  • Glass jar for storage

METHOD

  1. Combine all ingredients together in a bowl.
  2. Stir well, about 3 minutes for the mixture to become well-combined, depending on the temperature.
  3. Place in a glass jar, label and keep in a cool, dark area (especially during the warmer months).

Makes about 1 cup which will last last for at least 3 months. 

Coconut-Orange-Deoderant.jpg

Roasted Turmeric Chicken

roasted-turmeric-chicken

Roasted chicken is a simple way to add protein into your diet. At Westside we always purchase organic free-range chicken, and love Cherry Tree Farms and Milawa Free Range Poultry producers for their commitment to flavour and sustainable farming practices.  

The addition of ground turmeric to this meal provides anti-inflammatory and antioxidant compounds to help keep your body healthy.  

From the leftovers you can have meat for salads and sandwiches for the week, and also gut-healing bone broth.

Ingredients

  • 1 x organic free range chicken
  • 1 tbs ground turmeric
  • 3 x dutch cream potatoes (or 6 x large chunks of pumpkin with skin on for paleo version)
  • 2 x medium beetroots
  • 1 x medium sweet potato
  • 1 x medium zucchini
  • 1 x onion
  • 3 x garlic cloves
  • 1/2 lemon 
  • Bunch of mixed herbs such as rosemary, marjoram, thyme, sage
  • Salt and pepper
  • Dash of extra virgin olive oil
  • 200mL verjuice*

*Denotes optional

Method

  1. Remove chicken from fridge 1 hour prior to cooking, keep out of direct sunlight.
  2. Preheat oven to 170C degrees.
  3. Splash some olive oil into the bottom of a roasting pan.
  4. Cut beetroot, potatoes, sweet potato, zucchini and onion into large chunks.
  5. Place chicken into the roasting pan and drizzle some olive oil. Sprinkle turmeric over the top side of of the chicken. 
  6. Place herbs, lemon and garlic inside the cavity of the chicken.
  7. Surround the chicken with the chopped vegetables. Sprinkle with salt, pepper & any leftover herbs. 
  8. Place the chicken into the oven and roast for 1.5 hours, turning the vegetables once.
  9. Remove the vegetables from the pan and cover. Remove chicken from the pan and leave to rest for 20 minutes before carving.
  10. While the chicken is resting make a verjuice gravy by heating the oven pan on the stove until the drippings become crispy in the pan. Add verjuice and simmer on medium heat until the sauce thickens. 

Serves 6. Enjoy x

DIY Zero Waste Toothpaste

bentonite clay website ver.jpg

Here at Westside Wellness, we love making our own skin, body and household products, mainly because we know EXACTLY what is going into those products AND because they work so well and are so cheap to make!

If you haven't used homemade toothpaste before, it is a *bit* of an adjustment, they are no where near as sweet and minty as the kind of toothpaste you can get at the supermarket, but once you've used it you'll never go back as homemade toothpaste leaves your teeth feeling so clean and helps to remove staining too.

Lets talk about the ingredients:

  • coconut oil: antimicrobial/bacterial, draws toxins out of mouth and is effective against tooth decay, gum disease and whitens teeth
  • baking soda: neutralises acids in our mouth and helps to prevent tooth decay; is also mildly abrasive so helps with removal of stains
  • bentonite clay: aids with remineralisation and draws toxins out of your mouth
  • calcium powder: aids with reminderalisation
  • peppermint, tea tree and eucalyptus essential oils: all 3 are antimicrobial/bacterial and help to reduce odour

One small jar lasts approx 2 months, for extra teeth whitening we add a sprinkling of activated charcoal to our toothbrush a couple of times per week.

INGREDIENTS

  • 1/4 cup coconut oil (liquid or solid is fine, but we prefer to use liquid as it's easier to get on your toothbrush

  • 2 tbs baking soda

  • 2 tsp bentonite clay (you can get it at The Source)

  • 1 tsp calcium powder (we like Lifestream products)

  • 20-30 drops peppermint essential oil (we love The Oil Garden oils)

  • 8 drops each of eucalyptus and tea tree essential oils (we think Thursday Plantation oils are fab!)

METHOD

Place all of the ingredients in a bowl and using a wooden or plastic spoon, mix until well combined. Scoop/pour into a small airtight jar.

To use, dip your toothbrush in and cover with the toothpaste. If you use solid coconut oil you may need to use a small spoon to scoop it out. Due to the oil content, we recommend avoiding spitting down the drain, instead you can spit into your compost bin, garden or have a spit jar on hand (a bit gross, but practical).

zero waste toothpaste website ver.jpg

Homemade Activated Sunflower Butter

sunflower seeds web ver.jpg

With my eldest starting school next year and most schools being either nut free or nut aware, I've been wanting to come up with nutritious, quick and healthy recipes that are also nut free. We love nut butters in our house because they are high in protein, good fats and minerals so I decided to experiment with sunflower seed butter to see if it would be a good replacement, and it is!

Activating the seeds is an extra step, but it's definitely worth it for improving digestibility and nutrition (you can read about why we activate seeds, among other things here). Sunflower seeds are particularly high in zinc (around 5 mg per 100 g) as well as vitamin E and B vitamins among others. Zinc is especially important for growing bodies and brain development so its a nutrient I make sure my kids are getting each and every day. Soaking sunflower seeds in water with a little apple cider vinegar helps to break down anti-nutrients that reduce the absorption of minerals such as zinc. It is an extra step in the recipe, so definitely not 100% important if you don't have time.

I love the taste of sunflower seeds, especially roasted ones, so was very happy with the flavour, however, it definitely doesn't taste EXACTLY like other nut butters. My two year old absolutely loved it, however my 4 year old isn't quite sold yet! Organic sunflower seeds are exceptionally cheaper than most nuts and we grown sunflower seeds in Australia, so sunflower seed butter is definitely a great addition to your pantry for cooking and baking to replace some of those more expensive butters.

Enjoy!- Renee

Makes approx 300 gram jar of sunflower seed butter

Ingredients

  • 4 cups sunflower seeds/kernals
  • 2 tbs apple cider vinegar

Method

  1. Place the sunflower seeds in a large bowl, add the apple cider vinegar and cover with water (filtered is best). Leave to soak for 4-6 hours (overnight is fine too).
  2. When you are ready to make the butter, preheat your oven to 180 degrees Celcius. Line two baking trays with baking paper or silicone baking mats.
  3. Strain the sunflower seeds, running fresh through to wash off any residue. Shake out any excess water and spread the seeds evenly on the baking trays.
  4. Place in the oven and bake until seeds are golden brown, 20-30 minutes. You will need to mix the seeds at the 10 minute mark to ensure evenness of the baking, then again every 5-10 minutes until all the seeds are golden. They may clump together in the beginning as they are quite wet, just do your best to mix and un-clump them. Ensure that all the seeds are at least dry if not completely toasted as this can affect the butter.
  5. Allow to cool for 10 minutes, then place in a food processor/blender/thermomix and process on high speed for 2-4 minutes. The seeds will go from full seeds, to powder then eventually the oils will be released and your sunflower seed butter is made! Stop and scrap down the sides of the bowl/blender/processor to ensure all the seeds have been processed. Continue to blend until you get a consistency you like, I found to get it really smooth it was around 4 minutes.
  6. Store in a clean and airtight container. It will last 2-3 months. Best stored in the fridge in the warmer months.
jar of sunflower butter website ver.jpg

Dairy & Refined Sugar Free Quick Chocolate

chocolate lovehearts.jpg

I love chocolate! There I said it! Sometimes I get cravings for a little choccie and know that if I buy some sugar filled crap or even the so called 'sugar free' chocolates that are actually delicious, I will feel yuck and totally remorseful about the choice. So I came up with this recipe for quick homemade chocolate. It takes a couple of minutes to prep than you can chuck it in the freezer and be eating it in as little as 15 minutes (if you're happy with something a little fudgy) and up to 30 minutes for 'proper' chocolate.

Because its made with coconut oil, it does need to stay refrigerated or frozen (I actually like keeping mine in the freezer, helps to stop eating it all in one go!). If you don't have chocolate moulds, you can line a small baking tray with baking paper, pour the mix on top and chuck in the freezer. Break it up into chocolate bark.

This recipe is super versatile, you can add frozen berries, dried fruit, crushed nuts and seeds. You can also you the liquid mix to dip chocolates or ice cream blocks into or drizzle over the top of desserts. Enjoy!

-Renee x

Ingredients

  • 3 tbs coconut oil
  • 2 tbs rice malt syrup
  • 1 ½ - 2 tbs cacao (depending on how strong you like your chocolate)
  • 1/8 tsp salt
  • Optional- 10 nuts (almonds, hazelnuts, cashews etc), roughly crushed

Method

  1. On a low heat, gently melt all the ingredients together, using a whisk to combine.
  2. If you're using nuts, place a small amount in each mould or spread onto the baking paper.
  3. Allow to cool for a minute, whisk again to combine, pour into chocolate moulds * and place immediately in the freezer. These will take 20-30 minutes to completely set, but I also like to eat them after about 10-15 minutes as they have a consistency like fudge.

Once set, the chocolate should be kept in the fridge or freezer.

*I got cheap heart shaped moulds from kmart, and chocolate block moulds from Heavenly Cacao

eaten chocolate.jpg

Wheat & Refined Sugar Free Lactation Cookies

lactation cookies.jpg

Lactation cookies are loaded with nutritious ingredients that also double as galactogogues, foods that may help to boost breastmilk supply. Oats, brewers yeast and flaxseed all work together to get that supply up (in conjunction with regular feeding and/or pumping).

Renee created this recipe when she had her second son, firstly because she needed a tasty treat to get her through those hours and hours of breastfeeding and secondly because so many recipe out there contained white flour, white sugar and not much else. She wanted a recipe that was delicious but also nutritious, providing protein and good fats and could be eaten with one hand (she knows what its like to spend months eating with only one hand!).

You can sub the gluten free flours for spelt, khorasan or wheat flour, the coconut sugar for regular or rapadura sugar and the oats for rice flakes, almond meal or extra flour (although the oats are a key milk boosting component in the recipe!).

We love baking a fresh batch of these and including them in food hampers we take to our mumma friends who've just had a baby. They can be made in advance and freeze/defrost exceptionally well. Enjoy! (.)(.)

Ingredients

  • 3/4 cup brown rice flour *
  • 1/2 cup buckwheat flour *
  • 1/4 cup besan (chickpea flour) *
  • 11/2 tsp baking powder
  • 1/2 tsp bicarb (baking soda)
  • 1/4 tsp salt
  • 1/2 cup coconut oil
  • 2 tbs ground flaxseed (linseed)
  • 2 eggs (or 2 flaxeggs: 2 tbs ground flaxseed & 4 tbs water combined then let sit for 10 mins + 1 tbs plant based milk)
  • 1/2 - 3/4 cup coconut sugar, depending on how sweet you’d like them
  • 1 tsp vanilla extract
  • 1 cup oats
  • 3 tbs brewers yeast
  • 1 tsp cinnamon
  • 3 fresh dates, cut up
  • small handful of almonds, crushed (optional)
  • *(1 cup total flour so you can use wholemeal wheat or spelt flour instead)

Method

  1. Preheat oven to 180 degrees.
  2. Cream together sugar, vanilla, dates and coconut oil. Add eggs/flaxeggs and combine until well mixed.
  3. Add the remaining ingredients, except the crushed almonds, and combine until well mixed (I do this in a food processor to make the mixture quite smooth).
  4. Add the almonds and stir through by hand.
  5. Divide the mixture into golf ball sized balls and place even only a greased (or line with baking paper) baking tray. They don’t spread hugely but keep them a bit separate. Using a fork gently flatten the dough balls slightly.
  6. Bake at 180 degrees for 10-12 minutes, or until golden brown.

These will last around 5 days in the fridge or can be frozen.

eaten cookie.jpg

Cashew Pesto

cashews-yarraville-naturopath-healthy-eating

Pesto is a simple way to get alkalising and anti-inflammatory nutrients into your diet while not missing out on flavour.

At Westside Wellness we are constantly recommending to our naturopathy clients to eat more greens - and pesto is a quick and easy way to add greens to an existing meal, simply dash some on top of beef, tofu or eggs, add to salad for extra flavour or spread on sandwiches.

Best of all, the whole family loves pesto! It's like my 4 year old has NO idea that it contains nuts (ha ha ha!) and my 2 year old seems to only spy the carbohydrate or protein below it (winning!!!).

Ingredients

  • 2/3 cup raw cashews

  • 1 clove garlic

  • 1 bunch of basil

  • 1/2 bunch of parsley

  • 2 sprigs of fresh rosemary

  • 1/2 cup of extra virgin olive oil

  • Juice and rind of 1 lemon

  • Salt and pepper to taste

Method

  1. Remove the large stems from the rosemary, basil and parsley.

  2. Finely grate the rind from the lemon (leaving the bitter pith behind).

  3. Juice the lemon.

  4. Add 1/4 cup of oil, lemon juice, garlic and salt and pepper to a food processor. Pulse until the garlic, lemon juice and oil are well combined.

  5. Throw in the cashews and fresh herbs.

  6. Pulse until the cashews and herbs are well mixed and not quite a paste.

  7. Leave the motor running and drizzle in the rest of the oil until the pesto becomes a paste.

Store in a jar with a layer of olive oil to keep fresh. Will keep in the fridge for 3 weeks. 

cashew-pesto-naturopath-yarraville

Pomegranate, Cherry Tomato and Quinoa Salad

This salad is packed with goodness and flavour! Great as a side dish served with grilled chicken breast or sautéed chickpeas or you can add a tin of tuna/salmon or chickpeas to it and serve as a main meal.

You can prep the salad dressing in advance (it gets better after a day or so in the fridge anyways) and whip it up quick smart. People will be blown away by how gourmet this nutritious dish is!

Serves 6 as a side dish and 4 as a main

salad ingredients web version.jpg

Salad dressing ingredients

  • ½ red onion, finely sliced

  • ¼ tsp salt

  • 1 tbs sesame oil

  • 1 tsp zest of ginger

  • 1 tbs olive oil

  • 1 tbs apple cider vinegar (white vinegar is fine too)

  • good dash of balsamic vinegar

  • juice of ½ lime

  • zest of 1 lime

  • 1 tsp rice malt syrup (or coconut or brown sugar)

  • Place in a bowl and combine well, making sure all the onion is covered. Set aside for a minimum of 20 minutes, but a few hours of resting will make it even more delicious and juicy.

Salad ingredients

  • 1 bunch of parsley (stalks removed)

  • Large handful of fresh mint (stalks removed)

  • Large handful of fresh chives

  • 1 punnet cherry tomatoes, cut into halves

  • 1 pomegranate, seeds and juice only

  • 1/3 cup quinoa

  • 1 cucumber cut into 1 cm chunks

  • 50 g of pine nuts

Method

  1. Place a small pot of water on the stove and bring to the boil. Rinse the quinoa thoroughly, and add to the boiling water, reduce the heat to a simmer and cook for 10-15 minutes. Check the quinoa, you want it ever so slightly crunchy. Drain the quinoa and rinse well with cold water to stop the cooking process. Set aside, allowing all the water to completely drain from it.

  2. Rinse the fresh herbs well, and shake out any excess water. Finely chop, and add to the bowl with the salad dressing.

  3. Add the cucumber, tomato and pomegranate seeds and juice to the bowl, then the drained quinoa and mix well.

  4. Taste and adjust the seasonings as needed. I usually add extra salt and pepper, another dash of balsamic and olive oil and the juice from ½ a lime (cause I like it extra tangy!).

  5. Dry roast the pine nuts over a lot heat in an dry frying pan. Turn them regularly, so they don’t burn. Once they are golden brown, remove from the heat and sprinkle over the top of the salad.

pomegranate salad web version.jpg

Sweet Garlicky Asparagus

sweet asparagus.jpg

We love veggie laden side dishes, they're quick to make and an easy way to bulk out main meals and get more veggies into you!

With asparagus season in full swing, why not have a try of this sweet, garlicky dish? Asparagus are a great source of vitamin C and the fibre they contain acts as a prebiotic, which means that it helps to feed the good bacteria in our gut!

Serves 4

Ingredients

  • 12-16 asparagus spears (I aim for 3-4 spears per person)
  • 2-6 cloves of garlic (depends on how much you like garlic)
  • olive oil
  • balsamic vinegar
  • salt and pepper
  • 1 tsp rice malt syrup
  • Lemon slices

Method

  1. Chop the woody ends of the asparagus off (usually around an inch). Finely chop the garlic.
  2. Heat about 1 tablespoon of olive oil in a frying pan. Over a medium/low heat, add the garlic and asparagus and sauté for about 2 minutes.
  3. Add the rice malt syrup, a few dashes of balsamic vinegar and some salt and pepper and sauté for another 2 minutes or so (cook depending on how soft or crunchy you like your asparagus, I like mine a little crunchy so I cook it for 4-5 minutes tops).
  4. Serve with a few slices of lemon.

Carrot Hummus with Paleo Crackers

carrot hummus.jpg
carrot hummus ingredients.jpg

If you're wanting to mix things up in the dip department, then this carrot hummus is definitely one to give a try! It's go a similar spiced flavour to regular hummus with the cumin and coriander, but the roasted carrots add a lovely sweetness to it, and the cashews add a punch nutritionally with protein, calcium and magnesium.

The crackers are great for those who eat paleo, grain or gluten free but also for those who want need a little variety in the cracker department.

You can omit the cashews in the dip and swap the almond meal for more coconut flour or tapioca flour if there's nut allergies or to keep them lunchbox friendly for school. You can also eat the baked carrot as is for a salty and sweet snack (I bake extra for that exact purpose).

The carrot hummus freezes well and the crackers will last 5 days in an airtight container and up to 10 days in a container in the fridge. Enjoy!

Ingredients

  • 2 carrots, cut into 1 cm thick disks
  • 2 tbs coconut oil, melted
  • 1 tsp ground coriander
  • 1 tsp ground cumin
  • ½ tsp ground sumac (or smoked paprika)
  • cracked pepper and a pinch of salt
  • Juice of ½-1 lemon
  • ½ cup cashews
  • 2 tbs tahini
  • ¼ tsp salt
  • pepper to taste
  • ½ tsp each ground cumin and coriander
  • 1 tsp olive oil

Method

  1. Preheat oven to 180 degrees celcius. Place cashews in a bowl, add 1/2 tsp salt and cover with water, leaving to soak for at least 2 hours (up to 6 hours).
  2. In bowl, combine the carrots, 1 teaspoon each of coriander and cumin, the sumac and coconut oil. Place a sheet of baking paper on a baking tray and pour the carrot mixture on top. Spread out and bake for around 20-30 minutes, until crispy on the outside and soft on the inside.
  3. Throw the baked carrots, soaked cashews (drained and rinsed), and the rest of the ingredients in a food processor or thermomix and blend until smoothish (depends on the texture you like it). Taste and add salt, pepper, cumin and coriander if necessary. If the mixture is a little too dry, add olive oil a teaspoon at a time until you get the consistency you like.
uncooked crackers.jpg

    Paleo Crackers

    Ingredients

    • 1/4 cup sesame seeds
    • 1/3 cup sunflower seeds
    • 1 tbs savoury yeast flakes
    • 3 tbs melted coconut oil
    • 1/2 cup coconut flour
    • 1 cup almond meal
    • 1/2 tsp salt
    • 2 eggs or 2 flaxeggs (2 tbs ground flaxseed + 4 tbs water)

    Method

    1. Preheat your oven to 180C.
    2. If you are using flaxeggs instead of eggs, place the ground flaxseed and water into a cup and mix well. Set aside.
    3. In a dry pan, toast the sesame and sunflower seeds until golden brown, this will take around 7 minutes.
    4. Place the toasted seeds into a food processor and grind into a fine powder
    5. Add the remaining ingredients (savoury yeast, melted coconut oil, coconut flour, almond meal, salt and eggs or flaxegg) and process until well combined.
    6. Form the mix into a large ball and flatten with a rolling pin between two sheets of baking paper until the pastry is approx 1/2 cm thick. Using a biscuit cutter or knife, cut the pastry into cracker shapes. Place the baking paper with the cut out pastry on a baking tray and bake for 10-15 minutes, until golden brown. You do want to watch these as the line between golden brown and burnt is pretty fine.

    Stored in an airtight container, these will keep for 5 days.

    carrot hummus & crackers.jpg

    Truly Sugar Free Biscuits

    savoury biscuit ingredients.jpg

    I've done the I Quit Sugar program several times now and am a real fan of it for re-setting my taste buds and getting off the sweet stuff for a period of time. I've now reached a point where I've realised that if I have good savoury snacks on hand I will always go for them, even if there's sweet stuff around too. 

    I love a good biscuit though and in my quest to find a truly sugar free bikkie and finding none, I realised I had to come up with my own recipe! And I love it! They're salty, soft with a little bit of crunch and high in nutrients such as protein, calcium and magnesium. You can tweak them as needed too, swapping almond meal for oats and cashew butter for sunflower butter to keep them nut free for school lunch boxes. They are quick to make and last around 5 days in an airtight container. Enjoy! -Renee 

    uncooked biscuits.jpg

    Ingredients

    • 2 tbs coconut oil
    • 4 tbs cashew butter (or other nut/seed butter)
    • 2 tbs tamari
    • 1 tbs rice wine vinegar
    • 2 flax eggs (2 tbs of ground flaxseed combined with 5 tbs of water, allow to sit for 5-10 mins until it becomes jelly like)
    • 1 cup almond meal (or oats)
    • 2 tbs savoury yeast flakes (optional, also called nutritional yeast)
    • ½ cup buckwheat (also called activated buckwheat or buckwheat groats)
    • 2 tbs sesame seeds
    • ¼ cup sunflower seeds
    • ¼ tsp ground ginger and turmeric
    • 1 tsp ground coriander
    • ¼-½ tsp salt

    Method

    1. Preheat oven to 180C degrees and line a baking tray with baking paper.
    2. Combine the coconut oil, cashew butter, tamari and rice wine vinegar until smooth. Add the remaining ingredients and combine well.
    3. Using a tablespoon, spoon the mixture and form into rough balls, placing on the baking tray. These won’t expand so you can put them fairly closely together.
    4. Bake for 20 or so minutes or until golden brown. Allow to cool before eating and store in an airtight container.
    cooked savoury biscuit.jpg

    Caramelised Dutch Carrots

    sweet salty carrots website ver.jpg

    This is another simple, yet tasty side dish that will fill your house with the wonderful smell of caramelised onion and oregano. It's sweet, salty and fragrant, and really takes no time to prepare at all. This serves 4 as part of multiple side dishes, or serves 2 as a side dish on its own. It can be prepared in advance, will keep in the fridge for 3-4 days, and can be gently re-heated before serving.

    INGREDIENTS

    • 1 bunch dutch carrots*

    • 1 onion, cut in half and thinly sliced

    • 4 cloves garlic, thinly sliced

    • 3-4 sprigs fresh oregano

    • salt and pepper

    • balsamic vinegar

    • 2 tbs extra virgin olive oil


    steamed carrots web vers.jpg

    METHOD

    1. Prepare your steamer to cook the carrots; fill the bottom pot with 1/4 water and bring to the boil. While the water is boiling, gently clean the carrots, taking care to remove all dirt. Once the water is boiled, place the carrots in the steamer on the top and steam for 7 or so minutes, until the carrots are cooked with slight firmness. Set aside.
    2. While the carrots are steaming, add the olive oil to a pan and bring to a medium heat. Add the onions and sauté for 10 minutes, stirring occasionally. Add the garlic and oregano, and cook for a further 5 minutes. The garlic and onions should look translucent and golden, with a touch of crispness.
    3. Add salt (around 1/4 tsp) and pepper to taste and a couple of dashes of balsmic vinegar and stir through.
    4. Add the carrots, gently mix the onion mix through and serve.

    Roasted Cherry Tomatoes with Chickpeas, Zucchini and Greens

    Serves 2-4 (2 on it's own, 4 bulked out with rice, quinoa or soft polenta)

    Ingredients

    • 1 punnet cherry tomatoes
    • 1 medium sized zucchini, grated
    • 3 large handfuls of baby spinach, or 6 kale leaves finely chopped
    • 1 onion, finely diced
    • 3-4 cloves garlic, finely diced
    • zest and juice of 1 lemon
    • 1 tbs extra-virgin olive oil
    • 2-3 tsp balsamic vinegar
    • 1/2 tsp salt
    • pepper to taste
    • 1/4 cup pine nuts
    • 1 tin chickpeas, drained and rinsed well
    roasted cherry tomatoes instagram.jpg

    Method

    1. Preheat oven to 180 degrees
    2. Pierce each tomato with a knife, removing any stalks and place in a small baking tray. Drizzle a little olive oil and balsamic vinegar and a sprinkling of salt and pepper over all the tomatoes and give a shake to cover them completely. Roast for 30 minutes.
    3. While the tomatoes are roasting, heat the olive oil in a pan over a medium heat. Add the onions and sauté for 10 minutes until almost caramelised. Add the zucchini, chickpeas, and garlic and sauté for another 5 minutes.
    4. Add the lemon zest and juice, leafy greens, pine nuts, salt, pepper and balsamic vinegar and cook for another minute until the greens have wilted. Stir through the roasted tomatoes, making sure you get all the juices from the baking dish as well. 
    5. Taste and adjust seasonings. Serve with cooked brown rice, quinoa or soft polenta.
    chickpeas & tomatoes website ver.jpg

    DIY Coconut Milk

    coconut-milk.jpg

    Making your own coconut milk is super easy! At first I was daunted by the idea of making coconut milk - it seemed like I was taking the whole "making food from scratch" thing a bit to far. But now I can't imagine buying coconut milk in a store because it's honestly super simple to make, inexpensive and doesn't involve lots of preparation time. I often whip up a batch before making  coconut-based curry. 

    All you need is two ingredients (desiccated coconut and water) and a couple of household kitchen items. Best of all you can make some coconut body scrub with the leftover coconut pulp - this stuff leaves your skin exfoliated, moisturised and silky smooth!

    Ingredients

    • 1.5 cups desiccated coconut
    • 4 cups of filtered water

    Utensils

    • Food processor, blender or thermomix
    • Fine mesh sieve, cheesecloth, nut milk bag or clean tea towel
    • Large bowl

    Method

    1. Heat water until almost boiling.
    2. Place coconut in the bowl and pour in hot water.
    3. Leave the coconut to absorb the water (about 3 minutes)
    4. Blend the coconut and water for 5 minutes or so until the liquid appears creamy. You may need to do this in two batches  depending on the volume capacity of your blender. 
    5. Strain through fine mesh sieve or cheesecloth.
    6. Keeps refrigerated for 3-4 days. Simply stir to recombine if the water and fat separate. 

    Makes 1L. 


    Homemade Nut Milk

    nut milk and nuts web vers.jpg

    Although there are some pretty good nut milks on the market these days, we generally make our own and encourage others to as well because it is so easy and cheap to make AND you can ensure that you're avoiding any added nasties such as thickeners, emulsifiers and preservatives. Not to mention the fact that a lot of the commercial brand nut milks actually contain a very small percentage of nuts!

    We like to mix it up but generally stick with almond or cashew milk because of their creamy flavour and compatibility with coffee, but you can also other nuts such as macadamia or seeds like hemp and sunflower (although they make a much nuttier tasting milk).

    Nut milks will last 3-4 days in the fridge and can replace dairy, soy and other milks. When heating for coffee or cooking, do so at low temperatures to avoid splitting. If splitting does occur, however, it is still drinkable.

    Enjoy! 

    INGREDIENTS

    • 1 cup of raw nuts (cashews, almonds, macadamia or a mixture)

    • 4 cups of filtered water

    • 1 tsp of good quality salt (we use Mount Zero pink lake salt)

    • *Optional ingredients: 1 tsp vanilla essence or 1/2 vanilla pod scraped out, 1 tsp cinnamon, 1 tbs rice malt syrup

    • You will also need a nut bag or fine muslin cloth for straining (we got our nut bag from The Source)

    METHOD

    1. Place the nuts and salt in a glass or ceramic jug or bowl and cover with water. Soak overnight or for at least 8 hours (except for cashews which only need 4-6 hours of soaking time)

    2. Drain and rinse the nuts thoroughly. Place in a food processor, blender or thermomix and add 4 cups of water*, processing on high for 2 minutes.

    3. Pour the contents into the nut bag, over a bowl and gently squeeze out all the nut milk. The pulp will retain a lot of milk so you really need to work it to get it all out. If you want to add any of the optional ingredients (sweetener, vanilla etc) chuck it in with the milk and give it a quick whizz in your process/thermomix. If you have used cashews you don’t need to strain, even better (you will get a bit of sediment in the bottle/jar so shake before use).

    4. Keep your nut milk in a glass jar or bottle in the fridge for up to 4 days.

    5. The left over nut pulp can be added to smoothies, soups (if not sweetened), added to crumbles or other desserts. We like to freeze the leftover pulp and when there is a largish amount, defrost it and dehydrate it for 24 hours or so until dry. Then we blitz it to turn into almond flour for baking! No waste there!

    *Please ensure you are not going over the liquid capacity of your processor, if it takes less than 4 cups, process the milk in halves (half nuts and half water)


    bottle of nutmilk web vers.jpg

    Chicken Soup

    Chicken-soup-hot.JPG

    Chicken soup is without a doubt one of the easiest, most nutritious, hearty meals we cook in our household. All it takes is one pot - and you can throw all the ingredients in together - cooking doesn't get simpler than that! 

    It's a bowl of bone broth-filled goodness, with lots of veg, herbs and spices to add extra nutrition, fibre and wonderful phytonutrients to keep your body healthy. Once the kids start to come down with a sniffle I always get a pot of this underway, and more often than not it keeps a head cold at bay. 

    Chicken, parsley and cabbage all contain glutamine - a wonderful amino acid that helps our body's tissues to repair - especially in our digestive tract where all this goodness is headed! I love this recipe for it's gut healing, anti-inflammatory and nutritive profile - but best of all I can make it in about 45 minutes at the end of a busy day when the kids are going mad before dinner!

    Ingredients

    • 6 chicken chops (thighs with bones)
    • 1 onion, sliced lengthways 
    • 2 cloves of garlic, finely chopped
    • 1/4 white cabbage, sliced
    • 2 waxy potatoes, chopped into bite-sized chunks
    • 2 small carrots, sliced
    • 2 stalks of celery, sliced
    • 2L of water
    • 6 whole peppercorns
    • 1 bay leaf
    • Bunch of parsley 
    • Pinch of salt

    Method

    1. Put water in a large pot on high heat. Add all of the above ingredients.
    2. Bring the pot to the boil and then reduce to a simmer for 40 minutes, until the potatoes are tender. 
    3. Using a slotted spoon, remove the chicken from the pot. Allow to sit on a chopping board for 5 minutes to slightly cool. 
    4. Being careful not to burn yourself, tear the chicken away from each of the bones and return the shredded chicken to the pot. 
    5. Serve while hot with some more freshly chopped parsley. 

    Serves 6

    Chicken-soup.jpg

    Osso Bucco

    Osso-bucco.jpg

    Spring may be around the corner but the weather is still chilly here in Melbourne's inner west - and that means I'm still cooking lots of hearty one pot meals! I can't go past Osso Bucco in winter, it's rich in favour, simple to prepare and easy on the family's shopping budget. 

    For biodynamic beef we like to shop at Hagen's Organics - although they're located outside the inner west we're happy to travel high quality organic and biodynamic meat. The result is always a better tasting meal with less toxin exposure and better impact on the environment when compared to conventional farming practices. 

    We like to prioritise our "organic dollar" and this means that we prefer to pay for organic meat and animal products over some fruits and vegetables (think the dirty dozen, clean fifteen). This is because animals, like us humans, store toxins in our body's fat deposits. When you eat some beef, you are also eating a portion of the cow's stored toxins including the pesticides and medications they were exposed to. When you eat biodynamic meat your exposure to these toxins reduces due to the strict farming practices of biodynamic farmers which prohibits the use of artificial chemicals.  

    This is my mother's recipe and will always remind me of cosy Sunday night dinners, with the fireplace roaring and our family all together. 

    Ingredients

    • 1kg beef osso bucco (about 4 shanks cut into 3 pieces each)
    • 1 tbs extra virgin olive oil
    • 2 carrots, sliced
    • 1 large onion, diced
    • 3 celery stalks, sliced
    • 1 cloves of garlic, peeled
    • Pinch of salt
    • Dash of ground pepper
    • 2 x 400g cans of tinned tomatoes or 8 chopped fresh tomatoes
    • 3/4 cup of red wine - I like Shiraz
    • 1 tsp dried thyme
    • 1 tsp mixed Italian dried herbs 
    • 2 bayleaves
    • 1 tbs stock paste/powder

    Method

    1. Preheat oven to 175C fan forced.
    2. Heat oil in a large casserole pot. Add the carrots, onions, celery and garlic over medium heat until the onions are tender.
    3. Remove the vegetable mixture from the pot.
    4. Over a high heat sear the osso bucco in batches using the same pot. Add oil sparingly if required. Once the meat is seared place on a plate to the side.
    5. Return the vegetable mixture to the pan and add the tomatoes, wine, stock and herbs. Bring liquid to the boil, stirring occasionally and then remove from heat. 
    6. Add the osso bucco to the sauce and season with salt and pepper.
    7. Put casserole pot into the oven with the lid on. Cook for 1 + 1/2  hours.
    8.  Serve with brown rice or mashed potato and gremolata (below).

    Serves 6

    Gremolata

    • 1 bunch of parsely, leaves removed from stems, chopped.
    • Rind of 1 lemon, finely grated
    • 1 clove of garlic, finely diced

    Simply combine the gremolata ingredients and sprinkle over the meat before serving.