sweet treat

Gluten-Free Tahini Brownies

Tahini-Gluten-Free-Brownies.jpg

Some people are not fans of tahini with sweets, but I LOVE it - the more fat the more satiating, IMO. 

When I was on a strict elimination diet while breast-feeding my youngest with food intolerances this was my go to sweet treat in the evenings when I was craving a little sumthin'-sumthin'.

The Health Benefits of Tahini

Tahini is made from sesame, so it's packed full of minerals like calcium and iron and also loaded with unsaturated fats to keep you feeling fuller for longer.

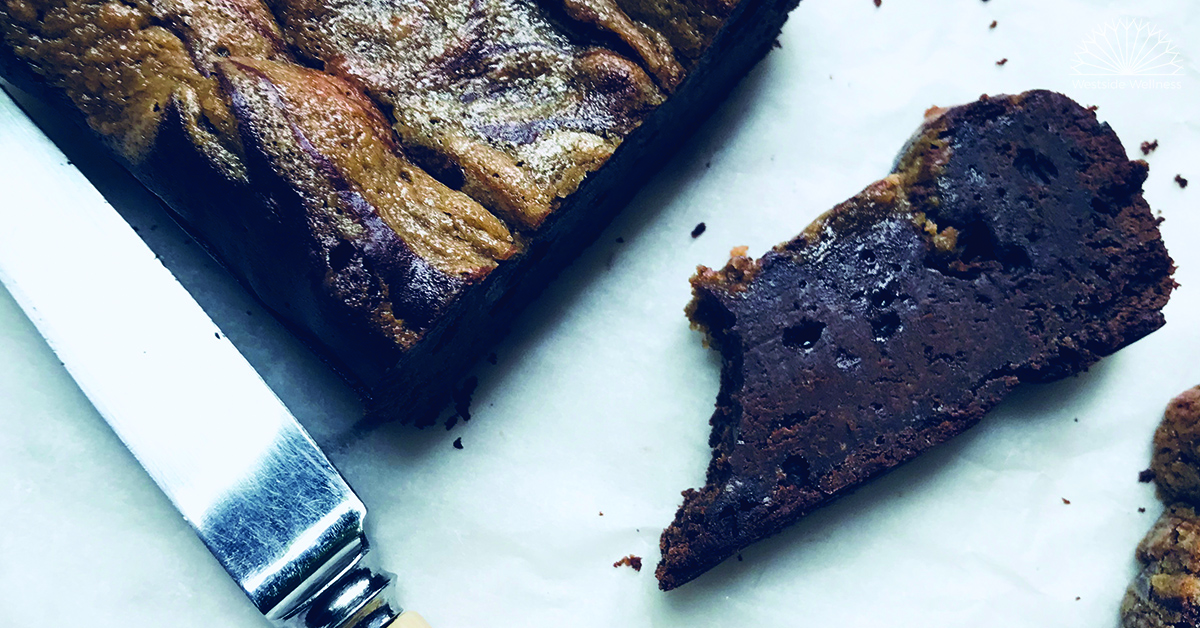
Adding tahini to brownies was just my way of tricking myself into thinking I was giving myself a 'healthy' sweet treat - but really it's just because I love how it combines with there bitterness of the chocolate.

Ingredients

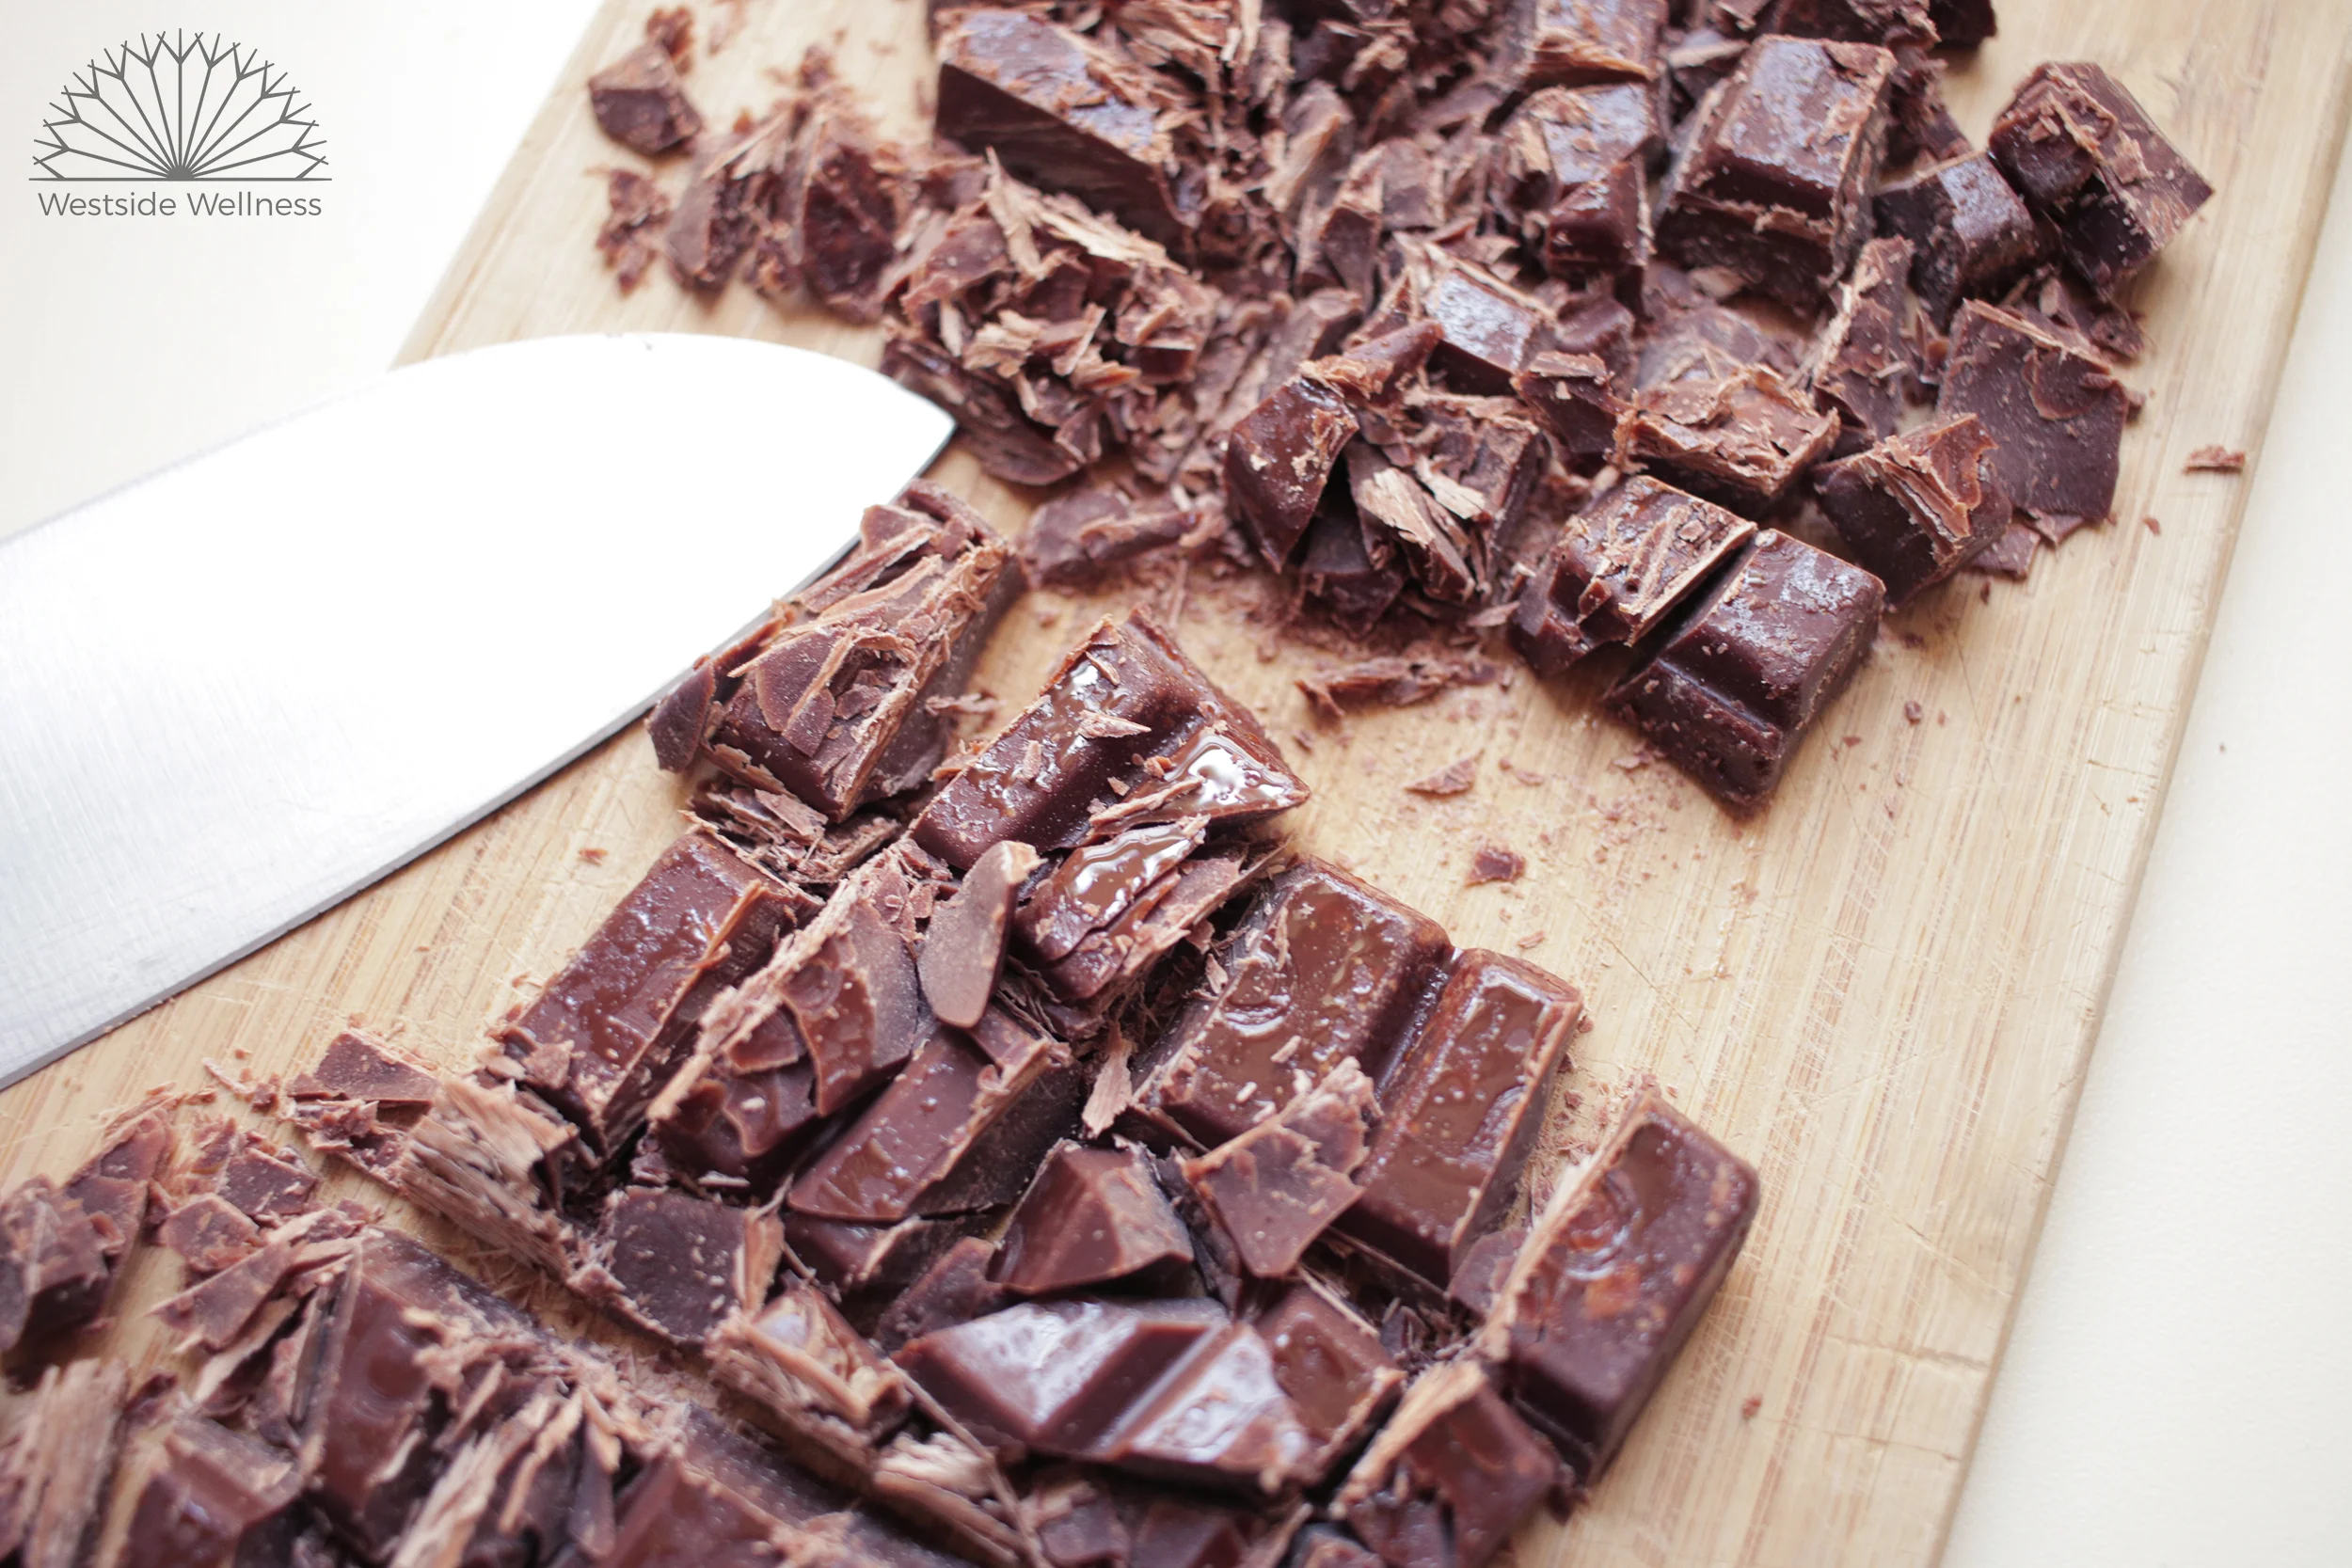
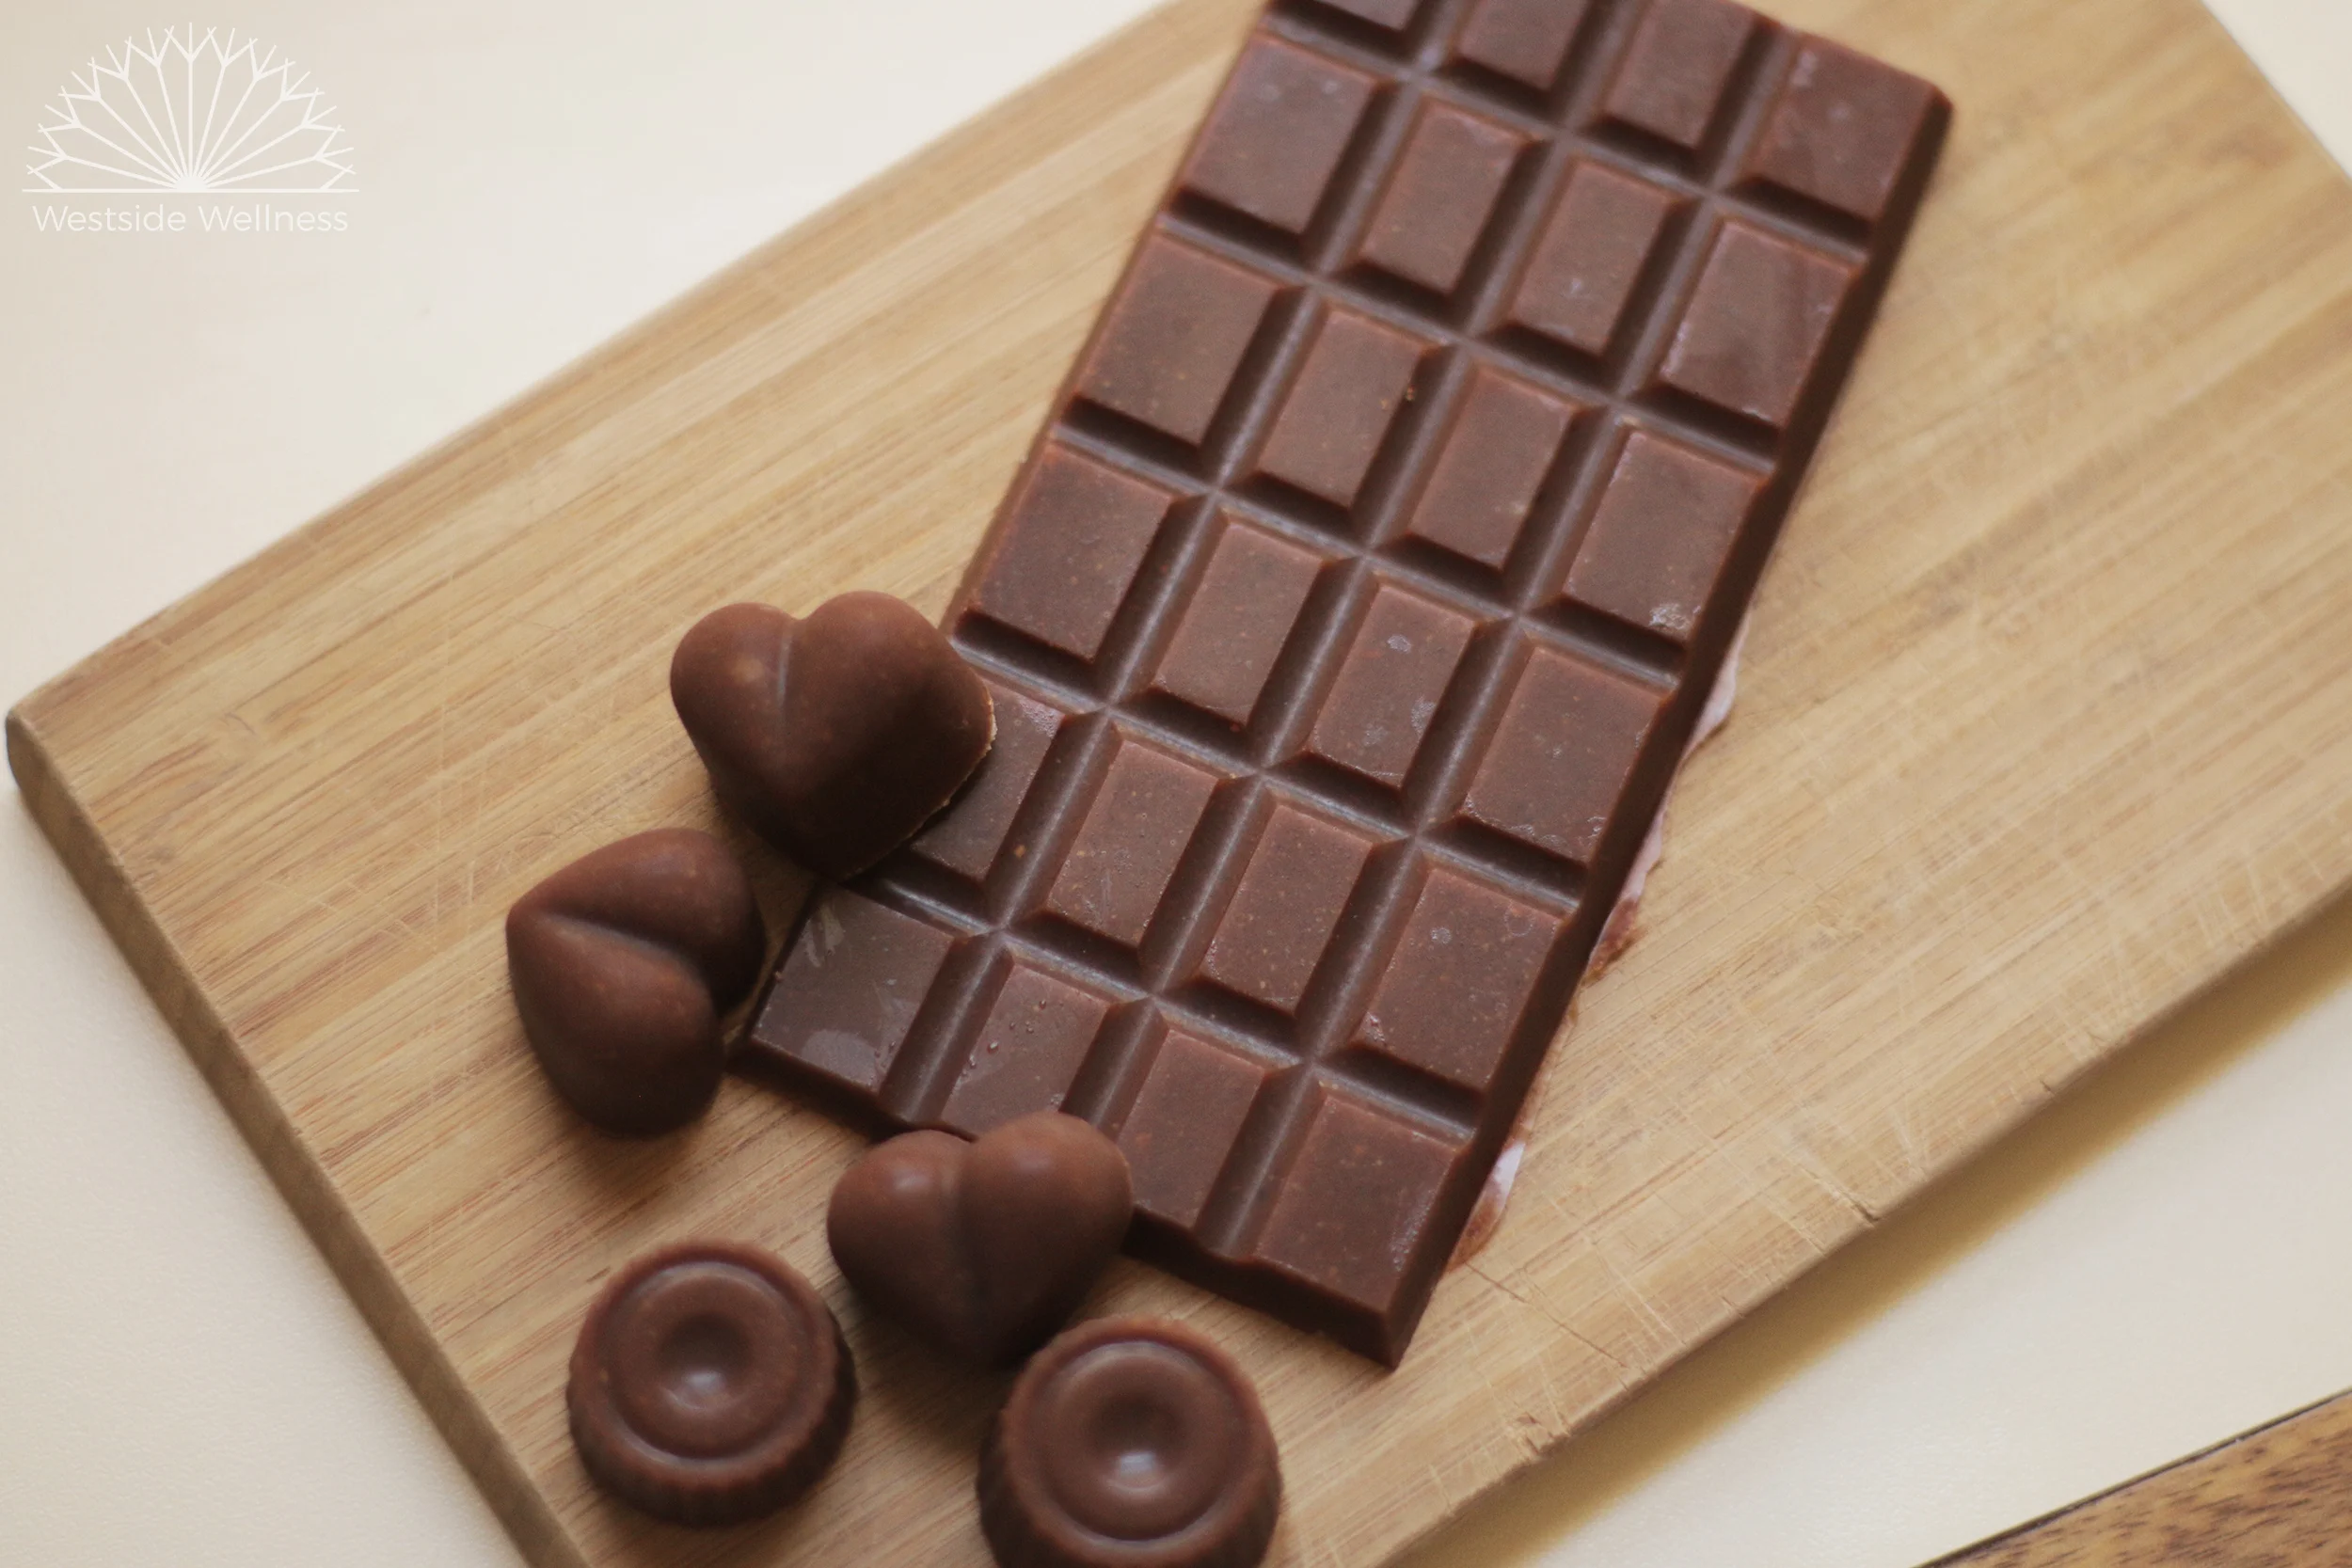
  • 1 x 120g of chopped dark chocolate - I love Loving Earth's Dark Chocolate, but you can also make your own 
  • 3 x tbs coconut oil
  • Pinch of salt
  • 4 x tbs hulled tahini (divided into 1 tbs and 3 tbs portions)
  • 3 x tbs of arrowroot powder (or cornstarch)
  • 2 x tbs of raw cacao powder
  • 2 eggs
  • 1/2 cup of coconut sugar
  • 2 x tbs maple syrup (or rice malt syrup)

Method

  1. Preheat oven to 180C.
  2. Line a bread loaf pan with baking paper (if not using a silicon one). Otherwise coat liberally with coconut oil to prevent sticking.
  3. Melt chopped chocolate with 1 x tbs of tahini, salt and coconut oiling a double boiler over low heath. Continue to stir until well combined and then remove from heat. 
  4. Combine raw cacao powder and arrowroot in small bowl. Mix with a whisk or spoon until the powders are well mixed and there are no lumps.
  5. Whisk eggs and coconut sugar in a large bowl until fluffy and smooth (about 3 mins).
  6. Spoon the liquid chocolate into the egg and sugar mixture, continue to whisk for another minute.
  7. Slowly add the arrowroot mixture to the bowl while continuing to whisk the mixture until a thick chocolate batter forms. Spoon this mixture into there prepared bread loaf tin.
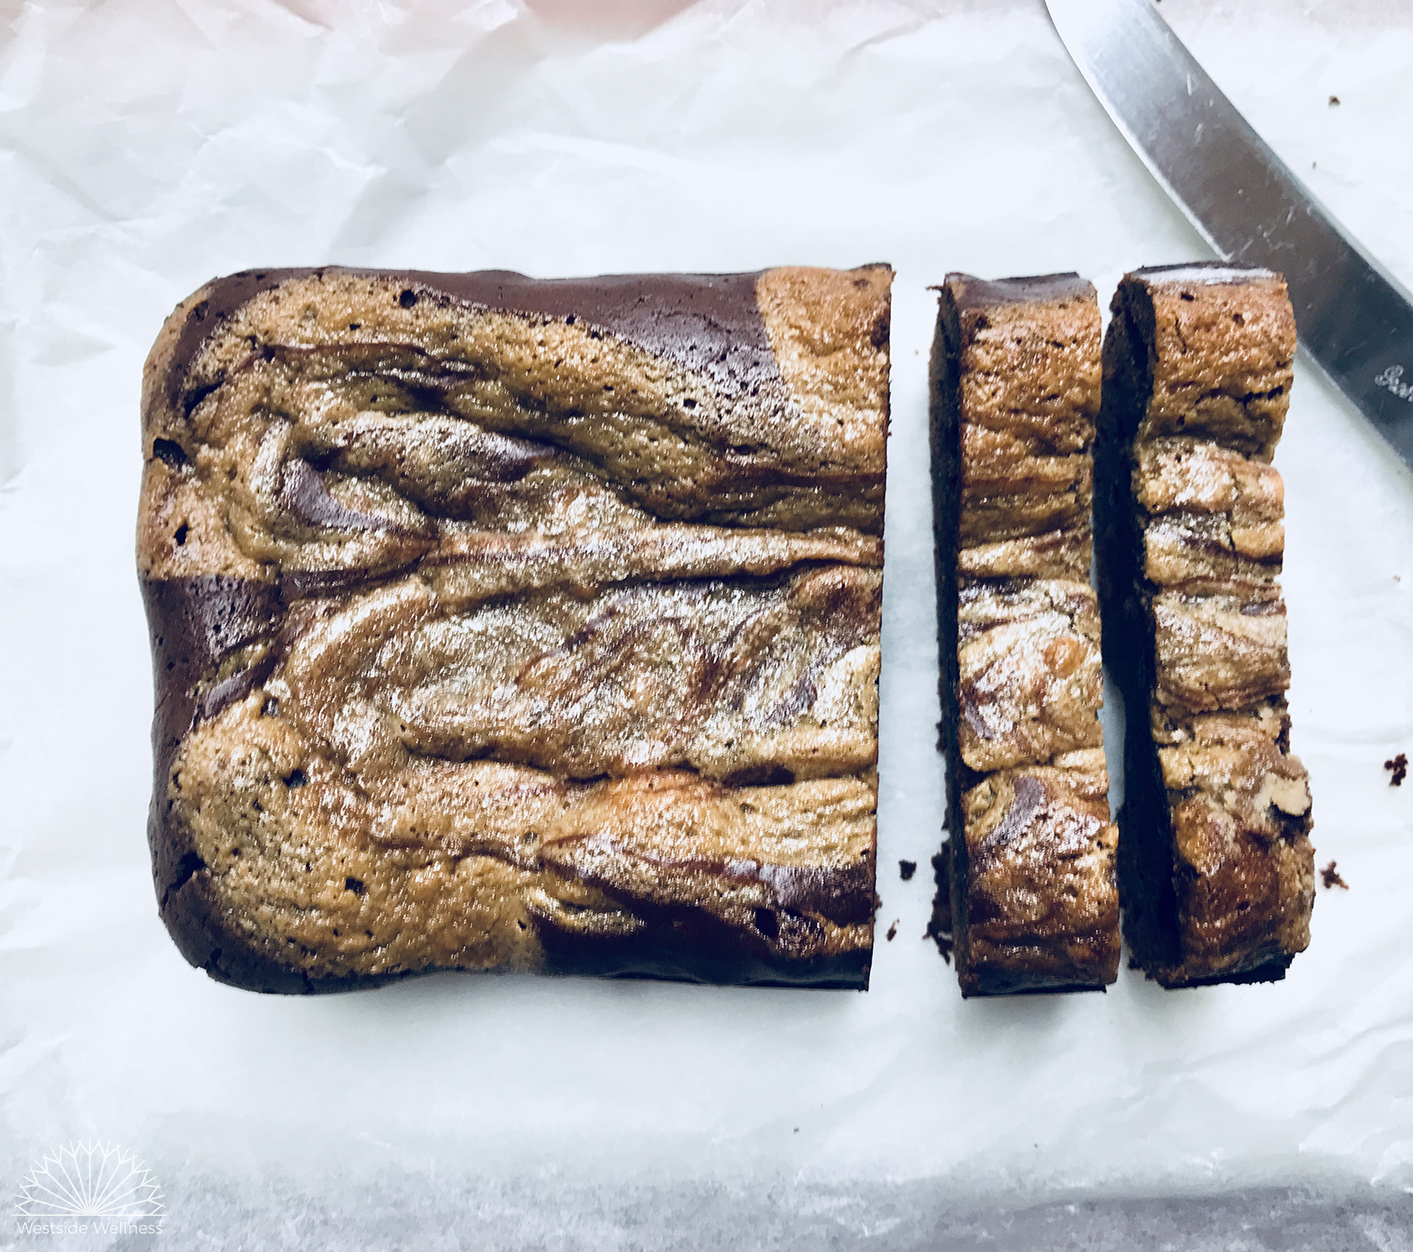
  8. Stir together the maple syrup and 3 x tbs of tahini in a small bowl until thick and creamy paste forms. Dollop the maple tahini cream onto the top of chocolate batter and fold it into the top of the brownie batter with a fork to create a swirl-like pattern on the surface.
  9. Bake for 22 mins.
  10. Remove from oven and allow to completely cool before removing from the pan and cutting. 

Makes 12

gluten-free-tahini-chocolate-brownies

Dairy Free Chocolate Popsicles

Prep time: 10 minutes

Freezing time: 2 hours

Serves: 4-6

These are a massive hit in our house! I love making these chocolate popsicles because they are dairy free, low sugar and super quick to make! I can whip them up in the morning or early afternoon, knowing that in a couple of hours they will be ready, perfect for those hot days when you need to cool off AND keep the kids happy!

If you need to keep them fructose free omit the dates, otherwise don't be afraid of the realistically small amount of sugar in them! Dates are also fibre rich which helps to slow down the absorption of sugar, and the addition of them in these popsicles adds a special sweetness and creaminess to the texture.

You can also play around with the flavours, omitting the cacao and swapping for carob powder or keeping them vanilla flavoured. If there's a cashew allergy, swap for other nuts such as almonds or macadamias or omit altogether.

I hope you enjoy my dairy free chocolate popsicles as much as we do in my house! x

INGREDIENTS

  • 1/2 cup raw cashews

  • 250 mls coconut milk (you could also use almond, rice or another non dairy milk)

  • 3 fresh dates, roughly chopped

  • 1 tsp vanilla essence

  • 2 tbs cacao powder

  • 2-3 tbs rice malt syrup

METHOD

  1. In a food processor or blender, process the cashews until a paste is formed.

  2. Add the rest of the ingredients and process until smooth.

  3. Pour the mixture into popsicle moulds (I use these and these).

  4. Place in the freezer for 2 hours until completely frozen. You will need to run the moulds under hot water for a for seconds to remove from the mould.

Carrot & Date Balls

carrot-balls-westside-wellness

This beautiful recipe was given to me by dear friend. Without a doubt it was love at first bite - I am HOOKED on these suckers.... and guess what?! So are the kiddos!

These balls are sweet from the delicious medjool dates but the sweetness is nicely balanced by the addition of cinnamon which helps to regulate blood sugar levels. Because they are full of carrots they are packed fibre, anti-inflammatory healthy fats and beta-carotene. And I just LOVE the earthy taste of the nutmeg which gives them a delicious autumnal flavour.

At Westside we are constantly talking to clients about having healthy snacks like these on hand, so when you are feeling like a little "sumthim sumthin"  at the end of the day then you have some nutritious options to turn to. Simple!

Plus they take about 10 minutes to make so there really is no excuse.

Ingredients

  • 1 & 1/2 x cups of grated carrot
  • 6-8 x medjool dates
  • 1 x cup of raw nuts (I like pecan but walnut, cashew & almond all work well too).
  • 1 x small handful of shredded coconut
  • 1 x pinch of ground nutmeg
  • 1 x tsp of ground cinnamon
  • Zest from 1 orange
  • 1 x tbs of almond meal or LSA to bind 
  • Extra shredded coconut to roll the balls in at the end

Method

  1. Blend all ingredients except for the almond meal/LSA together in a food processor until well combined. 
  2. Stir in the LSA or almond meal
  3. Roll mixture into balls and then roll each ball in some shredded coconut.
  4. Refrigerate in a sealed container for up to 2 weeks. 

Enjoy xx 

carrot-balls-healthy-snack-westside-wellness

Grain Free Apple Cake

Apple-cake.jpg

I came across this recipe on Fresh Planet Flavor looking for grain-free sweets to recommend to a client and have come to find it a very reliable, healthy & kid-friendly recipe. I've made a few minor adjustments and added a few steps about how to make your own applesauce because it's very easy to do.

Why Grain-Free?

You can probably tell that a lot of the recipes on our website are grain-free, this is because we find many of our clients struggle to digest them well. Also you can quickly boost the nutrient content of a meal once you swap something like processed white flour for buckwheat flour or coconut flour.

Make Your Own Applesauce

Applesauce works as a wonderful binder in recipes to bring ingredients together. It also add some sweetness and extra fibre to a recipe. You can purchase some from a grocery store but it is very easy to make and will save you a few extra dollars for something else. All you need is 4 ingredients and the cake recipe will leave you with plenty left over for pancakes or baked goods!

 Ingredients for Applesauce

  • 4 apples peeled, cored and roughly chopped
  • 1/4 cup coconut sugar
  • 1 tsp ground cinnamon
  • 3/4 cup of water

Method for Applesauce

  1. Place all ingredients into a large stainless steel pot.
  2. Cover and bring to the boil.
  3. Simmer for 20 minutes until the apples are soft (taking care that the water doesn't completely evaporate while cooking).
  4. Once cooled mash apples with a fork or hand blender

Applesauce will store in a glass jar in the fridge for up to 2 weeks. You can also freeze in an airtight container for up to 2 months.

Ingredients for Cake

  • 1/3 cup of coconut flour
  • 1 tsp gluten free baking soda
  • 1 tsp ground cinnamon
  • Pinch of sea salt
  • 2 eggs
  • 1 tablespoon of maple syrup or rice malt syrup
  • 1 tsp vanilla essence
  • 1/2 cup of applesauce
  • 1 apple, thinly sliced horizontally
  • Coconut oil to grease

Method for Cake

  1. Preheat oven to 170°C
  2. Grease a small cake tin with coconut oil. I used a 10cm x 21cm loaf tin.
  3. Sift the coconut flour, baking soda, cinnamon & salt into a small bowl.
  4. Whisk the eggs, sweetener, vanilla essence & applesauce until well combined in a large bowl. 
  5. Gently add the dry ingredients into the wet ingredients while continuing to whisk the mixture. The mixture will become very stiff. 
  6. Add the mixture to the pan and smooth the top of the cake. Add the thinly sliced apples to the top.
  7. Bake for 40 minutes until the mixture feels firm to touch and is golden on top.
  8. Allow to cool before removing from the pan.

Serves 6.   

Mini Choc Chip Cookies

chopped chocolate web.jpg

OMG, who doesn’t love tiny little choc chip cookies??? These babies have this lovely kinda wholemeal texture, but the chocolate makes them feel decadent and indulgent. Amazingly they stay really soft if kept in a airtight container, so I take a little box to work at the beginning of the week, for little arvo pick me ups, and they work a real treat! And bonus, my kids absolutely love them which is great as it can be difficult to find treats that are gluten, dairy and soy free for my two year old.

I generally bake them using coconut sugar, but have recently started using rice malt syrup instead in order to cut the sugar content down even further and love them! With rice malt syrup, they're more of a chewy, flat cookie and a little softer so be gently with them. If you're a real sweet tooth, stick with the coconut sugar, otherwise rice malt syrup is the way to go!

-Renee x

Makes 15 or so

sunflower seeds web.jpg

INGREDIENTS

  • ¼ cup sunflower seeds

  • 1 cup (or just under) Loving Earth mylk chocolate, chopped (use 90% Lindt chocolate instead to reduce fructose content further)

  • ½ cup unrefined coconut oil

  • ½ cup coconut sugar*

  • 1 tsp vanilla extract

  • 1 1/3 cup brown rice flour (you can also use almond flour)

  • 1/3 cup of each besan (chickpea) flour and tapioca/arrowroot flour

  • 1 tsp baking powder

  • 1 tsp baking soda

  • 1/8 tsp salt

  • 1 tsp cinnamon

  • 2 flax egg (2 tbs ground flaxseed + 4 tbs water mixed together)

  • 1/3 cup of plant based milk (soy, nut, rice, coconut)

  • 1 tbs vinegar

*swap for ½ cup rice malt syrup; adjust milk to 0

  1. Preheat the oven to 180 degrees. Line a couple of baking trays with baking paper, grease with a little coconut oil (you 100% need to do this if using rice malt syrup) and set aside. Add the vinegar to the ‘milk’ and roughly chop the chocolate and set both aside.

  2. In a large bowl cream together the coconut oil, coconut sugar and vanilla extract.

  3. Add the rest of the dry ingredients and combine well, then add the milk/vinegar combo and mix well. Stir in the chopped chocolate and sunflower seeds.

  4. Form the dough into walnut sized balls, place on the baking trays and gently flatten with a fork (if you're using rice malt syrup the mix will be quite wet, spoon 1 tbs of batter per cookie, keeping them spaced apart even further). Keep them fairly spaced out because they will expand a little.

  5. Bake for 10-12 minutes, or until they are golden brown. Keep an eye on them because they can overcook and will lose their chewiness.

**Please note these can dry out pretty quickly, so once they are cool (if there’s any left!) it’s best to keep them in an airtight container. If it’s really hot, best to keep them in the fridge and they’ll last close to a week.

cookie batter.jpg
raw cookies.jpg
cooked cookies Web.jpg

Homemade Hazelnut Chocolate

I love chocolate so much! Its such a nice treat to have here and there, and although I thoroughly enjoy my quick chocolate recipe, I wanted something that was a bit more true to store bought chocolate without the dairy, refined sugar and fillers.

I always have cacao butter on hand in the cupboard, it stores well and its a nice thing to have on hand for desserts. I had been playing around with a 'nutella' recipe using hazelnuts and thought why not combine the two to make chocolate? The result? A delicious, dairy and refined sugar free chocolate that ticks ALL the boxes. It's enjoyed by all members of my family (especially my youngest who has to avoid dairy to manage his eczema), and I made a big batch to give away in little jars as gifts over the festive season and they were a HUGE hit!

I hope you enjoy this chocolate recipe as much as I do. xRenee

roasting hazelnuts.jpg

Cooking time: 25 mins

Total time: 1 hour 25 mins

Makes: 3-4 trays of chocolates in moulds

Ingredients

  • 1 cup hazelnuts*

  • 200 g cacao butter, roughly chopped

  • 1/8-1/4 tsp salt

  • 1 1/2 tsp vanilla essence

  • 100 g rice malt syrup**

  • 1/4 cup cacao powder

Method

  1. Preheat your oven to 150 degrees Celcius.

  2. Line a baking tray with baking paper (or silicon baking sheet) and spread hazelnuts on top. Bake for 10-15 mins, rolling the hazelnuts around at the halfway point for even roasting. Remove from oven once the skins have become darker brown and started to split.

  3. Allow the hazelnuts to cool, then place in an airtight container and shake vigorously until the majority of the skins have come off. Once the skins have been removed place in a food processor/blender/thermomix and process until smooth, scraping down the sides to ensure its processed evenly. Set aside.

  4. Set up a double boiler (a pot half filled with water with a glass or metal bowl on top) and bring the water to the boil. Add the cacao butter and melt, stirring occasionally with a whisk.

  5. Once the cacao butter has melted add the remaining ingredients (including the hazelnut butter) and whisk over the heat until well combined.

  6. Pour the mixture into chocolate moulds (I place the moulds on a baking tray so they don't spill as I transfer) and place them in the freezer for 1 hour. As you are pouring the chocolate mix, stir regularly as the hazelnut butter tends to sink to the bottom. These chocolate don't melt as quickly as other homemade ones, but are still best kept in the freezer.


*You can use 1/2 cup of store bought hazelnut butter instead

**You can use any other liquid sweetener (honey, maple, coconut nectar etc) or very finely ground coconut sugar. Using rice malt syrup allows this recipe to be fructose friendly.

small chocolates website.jpg

Vegan Red Velvet Cake with Salted Caramel Ganache

chopped beetroot website ver.jpg

This is one of those hidden veggies, low refined sugar, sweet treats that we love here at Westside Wellness! It's been made for many a tea or birthday party, the ganache can be swapped for icing and it can even be poured into muffin tins for easier portioning.

The recipe is egg, dairy and gluten free so useful for families with intolerances and great for parties where different diets need to be catered to, but you can swap all of those for regular flour and dairy milk if preferred. 

Enjoy!

INGREDIENTS

  • 2 medium beetroots, peeled and chopped into 2 cm cubes

  • ½ cup coconut sugar

  • 1/3 cup coconut oil

  • 1 tsp vanilla extract or essence

  • 2 cups of flour: 1 ½ cups brown rice flour, ¼ cup corn flour, ¼ cup besan (chickpea) flour *

  • ¼ cup cacao

  • 1 tsp bicarb (baking soda)

  • 1 ½ tsp baking powder

  • ¼ tsp salt

  • ¾ cup of plant-based milk **

  • 2 tbs vinegar

METHOD

  1. Preheat oven to 180 degrees.
  2. Add vinegar to milk and set aside.
  3. Place the chopped up beetroot into a small pan and cover with water. Bring to the boil, reduce heat, cover with a lid and simmer for 20-30 minutes. You will need to keep an eye on this, stirring occasionally and adding a bit more water if it starts to dry out. Stab beetroot with a fork or skewer, you want it fairly soft, a bit firm is ok though.
  4. Once beetroot is cooked, puree it until smoothish (it will have a bit of texture to it).
  5. Cream together the pureed beetroot, coconut sugar, coconut oil and vanilla essence.
  6. Add the flour, bicarb, baking powder and salt and process until smooth.
  7. Add the milk and vinegar mix, again processing till smooth (this is quite a runny mixture, do not add more flour).
  8. Pour mixture into a greased cake tin, bang on bench to release any air bubbles.
  9. Bake at 180 degrees for 20-30 minutes. The cooking time will depend on your oven; gluten free cakes tend to cook quicker and will dry out if over cooked. Check with a skewer, if it comes out clean, or with dry crumbs on it, the cake is ready.
  10. Gluten free cakes can be soft and crumbly, allow to completely cool before turning out of tin.

CARAMEL GANACHE INGREDIENTS

METHOD

  1. Using a small saucepan and bowl as a double boiler, half fill the saucepan with water and bring to the boil.
  2. Break up the chocolate and add to the bowl on top, when most of it has melted, add the salt and coconut cream.
  3. Whisk gently until you have a smooth caramel.
  4. Allow to cool for a minute or two, then pour over your cake. You’ll want a plate slightly bigger than the cake to catch the run off.

CHOCOLATE GANACHE INGREDIENTS

  • 2 tbs coconut oil

  • 1 tbs coconut paste (I use loving earth)

  • 2 tbs rice malt syrup

  • 1 ½- 2 tbs cacao powder (use less or more depending on how strong you’d like the chocolate flavour)

METHOD

  1. Melt the coconut oil and coconut paste over a gentle heat.
  2. Once melted, add the rest of the ingredients and whisk together until smooth
  3. Remove from heat and continue whisking, allowing the mix to cool slightly
  4. Spread over cooled cake and caramel ganache. As the mixture cools, it will firm up more. If you store the cake in the fridge, it will get a whiteish sheen, this is just the coconut oil and will go away once the cake is at room temp.

* You can use any combo of gluten free flours, this is the combination that I’ve found works best, but you could probably use just brown rice and corn flour if you don’t have besan. Regular wheat or spelt flour also work great

** Any plant based milks will work, as will regular dairy milk


website version slice cake.jpg
Batman beetroot cake.jpg

Wheat & Refined Sugar Free Lactation Cookies

lactation cookies.jpg

Lactation cookies are loaded with nutritious ingredients that also double as galactogogues, foods that may help to boost breastmilk supply. Oats, brewers yeast and flaxseed all work together to get that supply up (in conjunction with regular feeding and/or pumping).

Renee created this recipe when she had her second son, firstly because she needed a tasty treat to get her through those hours and hours of breastfeeding and secondly because so many recipe out there contained white flour, white sugar and not much else. She wanted a recipe that was delicious but also nutritious, providing protein and good fats and could be eaten with one hand (she knows what its like to spend months eating with only one hand!).

You can sub the gluten free flours for spelt, khorasan or wheat flour, the coconut sugar for regular or rapadura sugar and the oats for rice flakes, almond meal or extra flour (although the oats are a key milk boosting component in the recipe!).

We love baking a fresh batch of these and including them in food hampers we take to our mumma friends who've just had a baby. They can be made in advance and freeze/defrost exceptionally well. Enjoy! (.)(.)

Ingredients

  • 3/4 cup brown rice flour *
  • 1/2 cup buckwheat flour *
  • 1/4 cup besan (chickpea flour) *
  • 11/2 tsp baking powder
  • 1/2 tsp bicarb (baking soda)
  • 1/4 tsp salt
  • 1/2 cup coconut oil
  • 2 tbs ground flaxseed (linseed)
  • 2 eggs (or 2 flaxeggs: 2 tbs ground flaxseed & 4 tbs water combined then let sit for 10 mins + 1 tbs plant based milk)
  • 1/2 - 3/4 cup coconut sugar, depending on how sweet you’d like them
  • 1 tsp vanilla extract
  • 1 cup oats
  • 3 tbs brewers yeast
  • 1 tsp cinnamon
  • 3 fresh dates, cut up
  • small handful of almonds, crushed (optional)
  • *(1 cup total flour so you can use wholemeal wheat or spelt flour instead)

Method

  1. Preheat oven to 180 degrees.
  2. Cream together sugar, vanilla, dates and coconut oil. Add eggs/flaxeggs and combine until well mixed.
  3. Add the remaining ingredients, except the crushed almonds, and combine until well mixed (I do this in a food processor to make the mixture quite smooth).
  4. Add the almonds and stir through by hand.
  5. Divide the mixture into golf ball sized balls and place even only a greased (or line with baking paper) baking tray. They don’t spread hugely but keep them a bit separate. Using a fork gently flatten the dough balls slightly.
  6. Bake at 180 degrees for 10-12 minutes, or until golden brown.

These will last around 5 days in the fridge or can be frozen.

eaten cookie.jpg