Stock & Spice Mixes

Sumac Seeded Dukkah

another-sumac-ingredients.jpg

Dukkah is probably one of my all time favourite ‘toppers’.

What’s a ‘topper’ you say?

Well, a topper is a nutrient dense addition to a meal, usually something eaten in small amounts but gives ultimate bang for your buck in terms of micro and macro nutrients. Bonus points if it also adds extra flavour to a meal too, and this is why dukkah is my favourite one.

This sumac seeded dukkah is an absolute sinch to make and a great one for whipping up for a gift when you want to be thrifty yet creative (the gift of food is my favourite gift!). It’s loaded with zinc rich seeds, and spices and herbs that add a little zing to your meal. It goes great with eggs cooked anyway, sprinkled over salads and steamed veggies, as a garnish for tip, the possibilities are truly endless! -Renee x

jar-of-sumac.jpg

Makes: 1 medium sized jar

Prep time: 5 minutes

Cooking time: 10 minutes

Total time: 15 minutes

INGREDIENTS

  • 1/2 cup sunflower seeds

  • 1/4 cup sesame seeds

  • 2 tablespoons coriander seeds

  • 1/4 tablespoon peppercorns

  • 3/4 tsp ground fennel

  • 3 tsp sumac

  • 1/2 tsp sweet paprika

  • 3/4-1 tsp salt (we use Mount Zero Pink Lake Salt)

  • 1 1/2 tsp dried thyme

METHOD

  1. In a non-stick pan and over a medium/high heat, dry roast the peppercorns and coriander seeds until they are fragrant and start to pop (approx. 2-3 minutes). Remove from heat and process until broken down but not completely ground.

  2. Add the sunflower seeds and dry roast for a minute or two until they start to brown, then add the sesame seeds and cook until the seeds are fully browned. Move around frequently to prevent sticking and burning.

  3. Remove from heat and add to your process/blender/thermomix along with the toasted coriander and peppercorns and remaining ingredients.

  4. Process until well broken down (I like to leave a few little chunks here and there). Taste and adjust seasoning, adding more salt or sumac if needed.

  5. Allow to cool completely, then store in an airtight container. Best consumed within 3 months as it will lose fragrance over time.

sumac-seeded-dukkha.jpg

Plant Based Gut Healing Broth

I think its easy to say that we've all heard the drill about how good bone broth is for digestive health and assisting with gut healing. At Westside Wellness, we regularly recommend consuming bone broth to our clients and have our own bone broth recipe here. If you're vegan or vegetarian or don't really want to cook with bones, you might be wondering if there's something you can have that covers so of the many food as medicine bases that bone broth does, and the answer is yes you can!

HEAL YOUR GUT WITH FOOD

Part of why we love bone broth so much is that it's a natural source of collagen. Our bodies contain significant amounts of collagen (around 1/3 of our body is collagen), and we need it for making and maintaining connective tissue. One reason collagen is useful for improving digestion is that it improves the production of gastric acid. The other reason, is that it contains the amino acids glutamine, proline and glycine, which are required for repair and rebuilding the gut lining. While collagen is only found in animal foods, there are many plant based foods that contain those amino acids found in collagen, required for gut healing. There are also many plant based foods that contain other important nutrients for gut health and boosting immune function so that your body can heal itself.

Here's a little about all the nutrients that you'll find in this broth and what they can do for digestion and gut healing. 

GLUTAMINE

Acts as a natural fuel for the intestines, assists with the regulation of cells and their growth, and therefore repair of cells in our gut, and reduces inflammation. Glutamine is found in plant based foods such as legumes (lentils, beans, peas) and veggies like spinach, parsley, cabbage and beetroot.

PROLINE

Assists with formation of collagen, wound healing, formation of connective tissue and regeneration of cartilage. Plant based sources of proline include cabbage, legumes (especially beans and chickpeas), buckwheat, alfalfa, peanuts and asparagus.

GLYCINE

As with the above, glycine is an important component of collagen. It also assist with improving digestion via its role in the production of bile, which is needed for fat breakdown. Plant based sources of glycine include legumes, spinach, kale, cauliflower, banana and kiwi fruit.

VITAMIN C

Vitamin C is required for the production and storage of collagen. It also acts as an antioxidant and anti-inflammatory agent, both of which are critical with damage or inflammation in the gut. Vitamin C is abundant in plant based foods and particularly good sources include citrus, berries, capsicum, parsley, kale and broccoli. 

ZINC

Zinc is also required for the production of collagen, but also assists with reducing inflammation, boosting immune function and also acts an an antioxidant. Zinc is found in many plant based foods, including sunflower and pumpkin seeds, spinach, whole-grains, legumes and mushrooms.

ADDITIONAL PLANT BASED FOODS FOR GUT HEALING

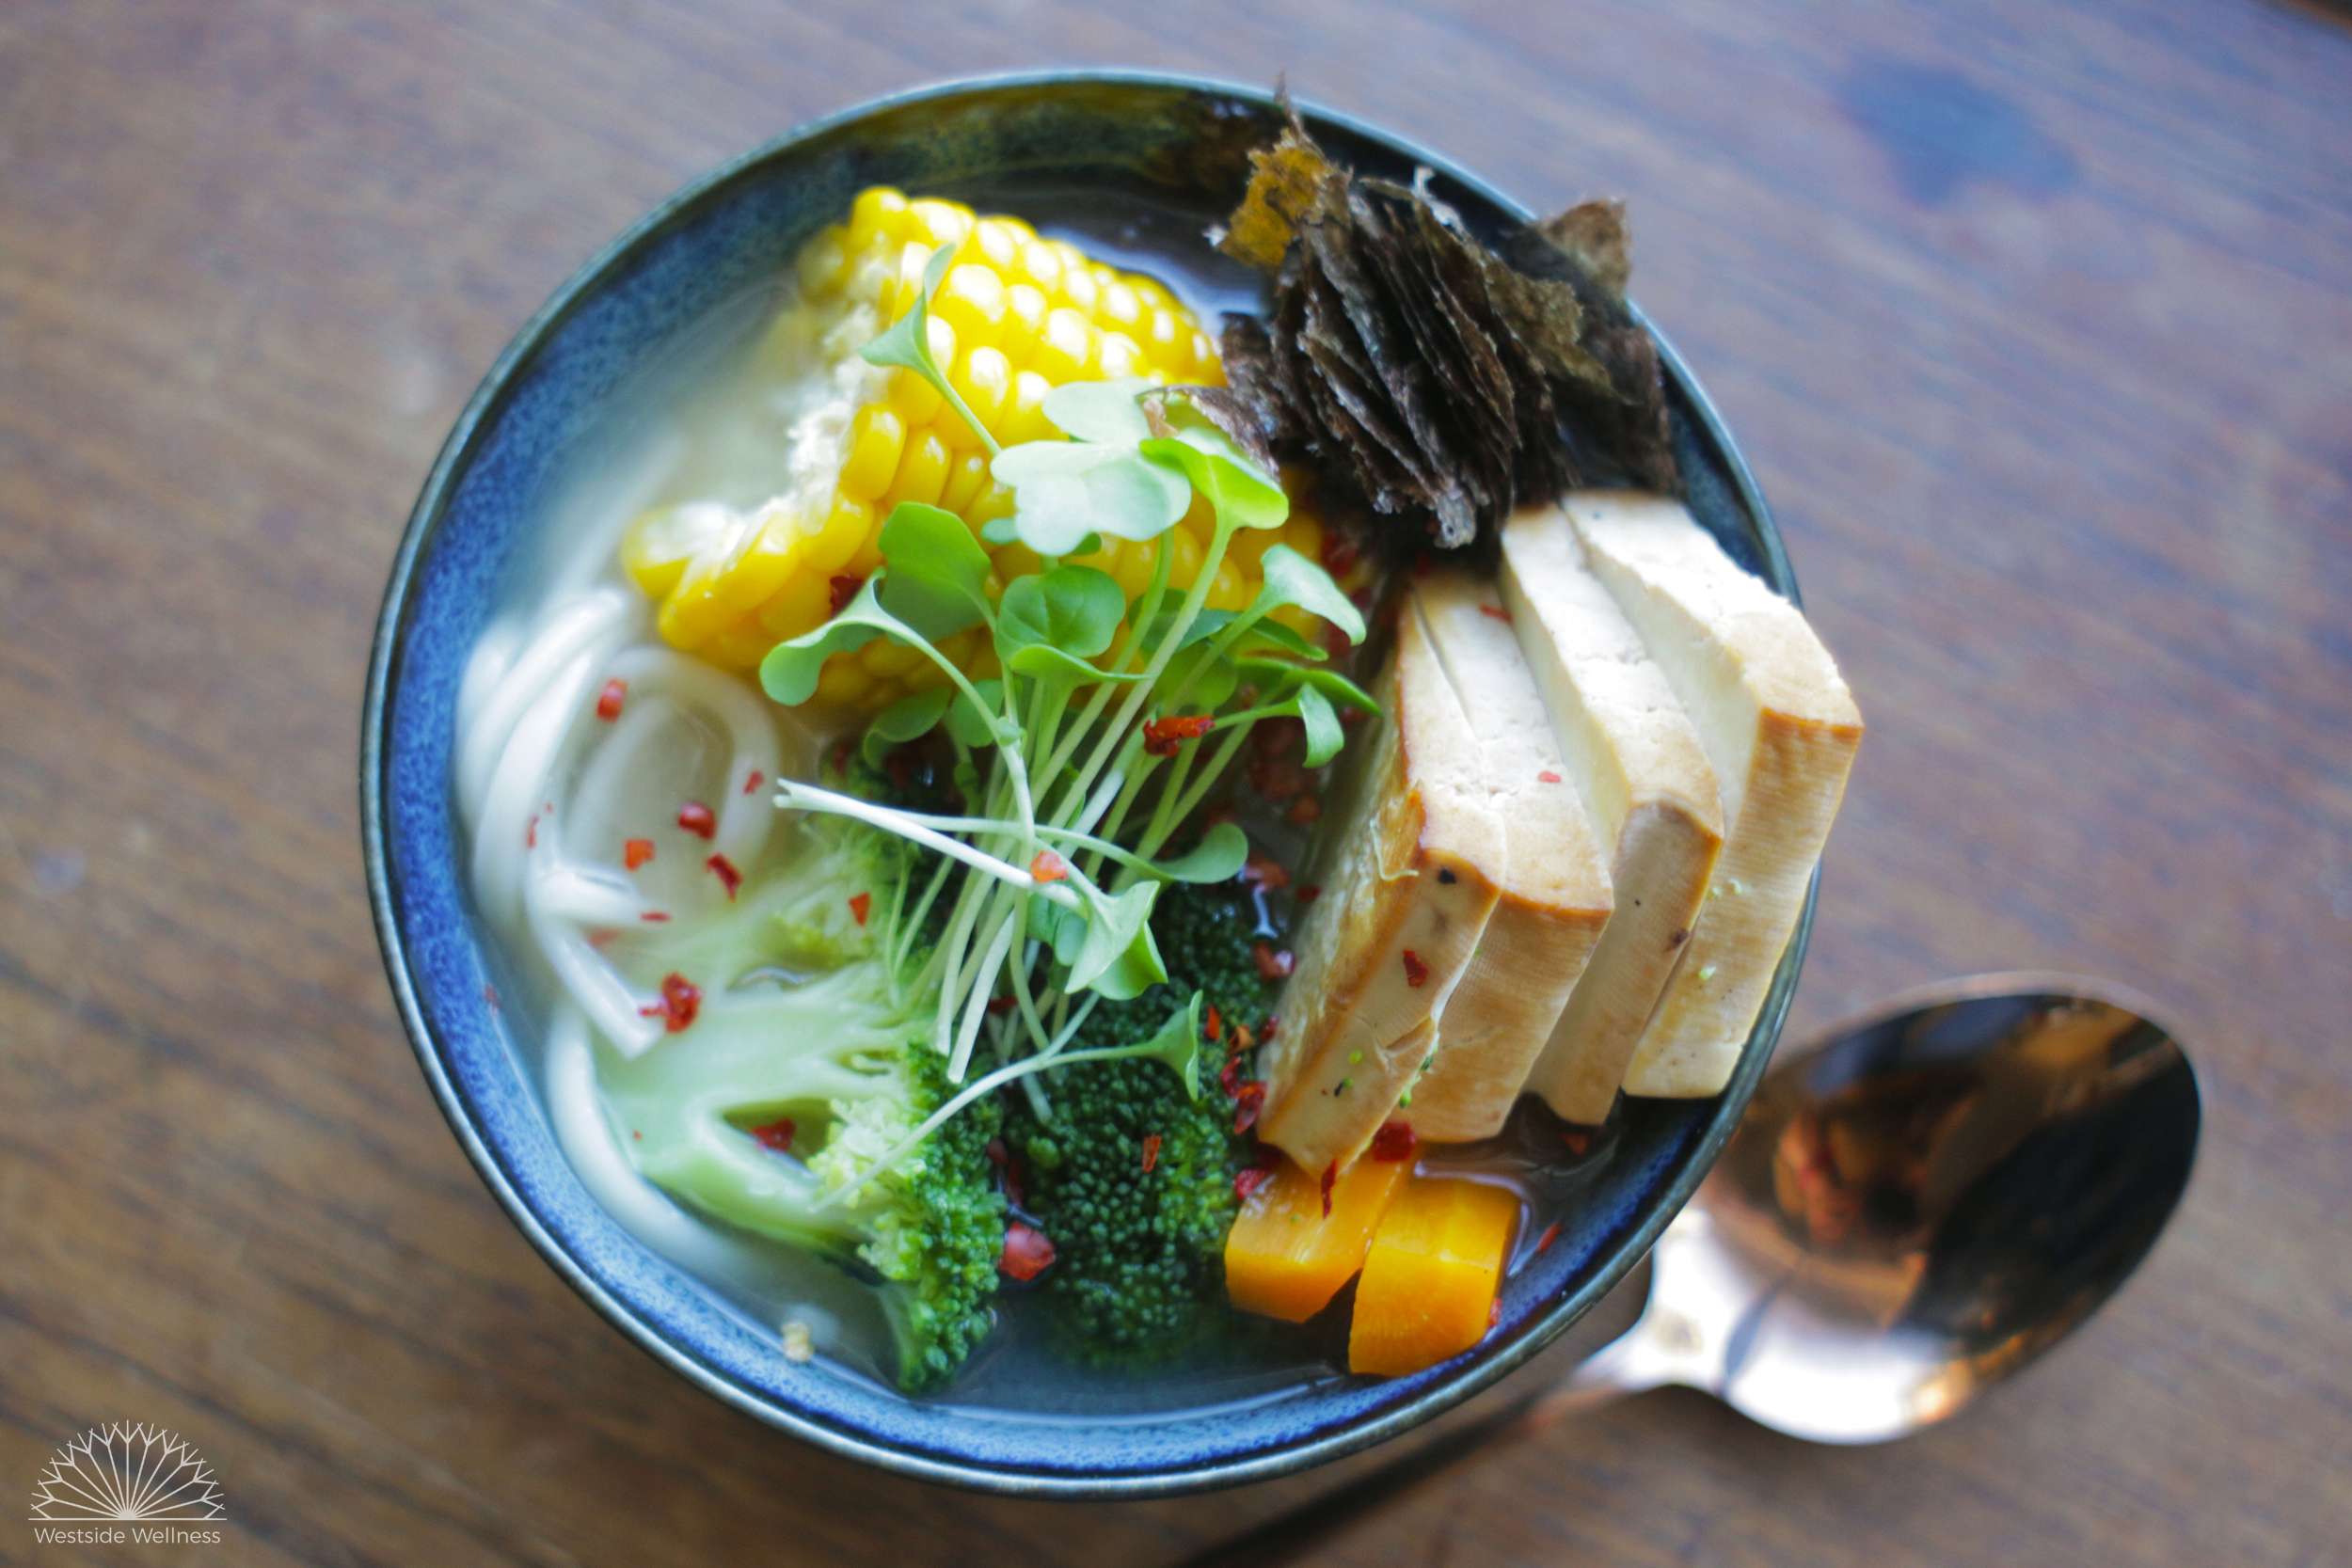
As you can see from the above, there are many plant based foods that contain the nutrients required for gut healing, and many of these foods are in this broth, or can be added to meals that contain the broth to enhance its gut healing properties. I've also included a couple of other food as medicine goodies that add more power to this gut healing broth:

SHIITAKE MUSHROOMS

Shiitake mushrooms are a potent source of amino acids (particularly lysine and leucine), polyunsaturated fatty acids, B vitamins, vitamin C and zinc. Shiitake, and other medicinal mushrooms, have been traditionally used for their immune-modulating/enhancing and their ability to enhance immune function and destroy cancer cells has been well documented and researched. 

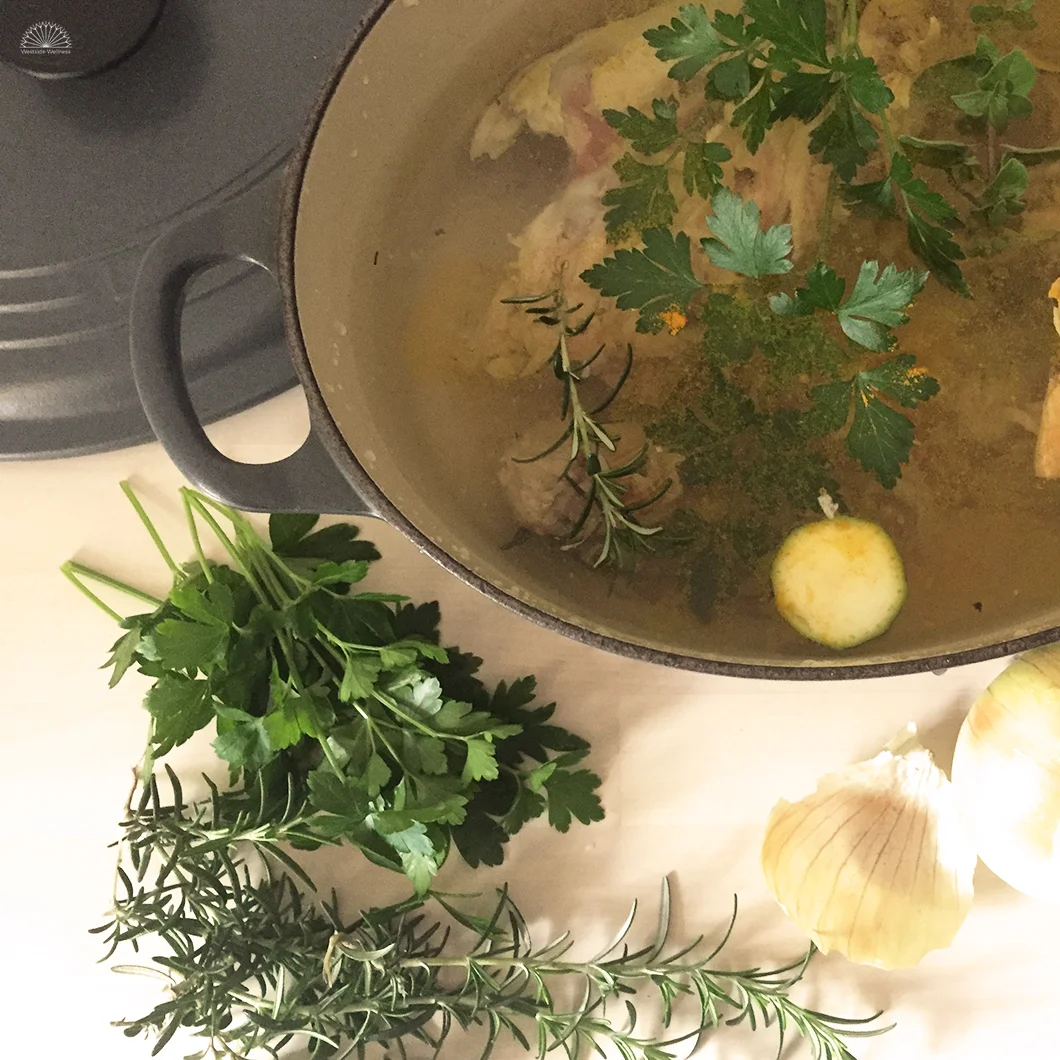
ONIONS, GARLIC AND GINGER

Onions and garlic are a rich source of flavonoids, which act as antioxidants and assist with reducing inflammation. They are also loaded with a special type of dietary fibre (inulin) that acts as a prebiotic, helping to feed our gut bacteria. Both onions and garlic naturally antibacterial/microbial which is beneficial in improving gut health/healing where pathogenic bacteria or parasites might be involved. Ginger is a potent anti-inflammatory food and also improves digestion by increasing the production of gastric acid and soothing and calming inflamed or irritated guts.

MISO

Miso is a salty paste made from fermented soy beans, rice or barley, or a combination of these. Due to the fermentation process, it is a great source of beneficial bacteria and a great addition to a gut loving diet. It is also a particularly good source of nutrients, including B vitamins, manganese, copper, zinc and protein. 

Prep time: 10 minutes

Cooking time: 2-6 hours

Serves: 4-8 (depending on how you use it)

soaking mushrooms.jpg

INGREDIENTS

  • 1 onion, finely diced
  • 4 cloves garlic, finely diced
  • 1 inch piece of ginger, finely chopped
  • 2 celery sticks, rinsed
  • 1/2 bunch parsley
  • 1.5 tbs miso (any variety will do)
  • 8 dried or fresh shiitake mushroom *
  • 1/4 green cabbage, finely chopped
  • 2 large broccoli stalks, cut into large chunks (I keep these in the freezer until I need them)
  • juice of 1 lemon
  • 6 cups filtered water (preferable, but you can also use regular tap water)
  • 1 tbs apple cider vinegar (ACV)
  • 2 tbs coconut oil

*if you're lucky enough to have access to fresh shiitake mushrooms go for it! You won't need to soak them either.

METHOD

  1. Soak the shiitake mushrooms in 1 litre of warm water for 20-30 minutes. Keep the liquid, but take the mushrooms out and finely slice.
  2. Heat the coconut oil in a large pot, and add the onion, celery, ginger and garlic.
  3. Sauté for 5 minutes, until the onions are translucent.
  4. Add the remaining ingredients, except the miso, and bring to the boil. Reduce the heat to a low boil and cook for 2-6 hours.
  5. Remove the parsley, celery sticks and broccoli chunks. Drain the broth keeping the mushroom, cabbage and onion etc to use in other dishes (like soups, stews or stir-fry).
  6. Allow to cool until warm and then add the miso (too much heat will damage the bacteria). Ensure you allow to the broth to cool completely before refrigerating or freezing. You can eat this broth with the veggies in it, adding legumes or tofu/tempe for protein, or you can use it as a base for other soups/stews/curries. Keep small amounts in the freezer to have on hand when sick, to be sipped to keep hydration up. The possibilities are truly endless!

'Chilli' Spice Mix

mexi spice mix web.jpg

This easy to make spice mix can replace all those yucky mixes that you can buy from the supermarket or in taco/burrito kits that often contain fillers, anti-caking agents and poor quality spices . You can use it in our chilli bean recipe here, or add to any of your own creations. 

We kept this 'chilli' spice mix recipe chilli free so that it is family friendly (and good for those who don't like too much heat!) but you can add cayenne pepper or chilli flakes if you desire. Enjoy!

INGREDIENTS

  • 1 1/2 tbs ground cumin

  • 2 1/2 tbs ground coriander

  • 1 tbs dried oregano

  • 1/2 tbs dried marjoram

  • 1- 1 1/2 tbs smoked paprika (depending on how smoky you like it)

  • 1 tsp ground fennel

  • 1 tsp ground cinnamon

  • 1 tsp ground turmeric

METHOD

  1. Combine all of the spices in a small bowl.

  2. Store in an airtight jar, this will last up to 6 months.

taco no chilli web.jpg

Homemade Mild Curry Powder

curry spices.jpg

Homemade curry powder is such a cheap and simple thing to make, I don't know why people don't make their own more! Store bought curry powder often has colours, additives and preservatives, so making your own enables you to know exactly what you are putting in your cooking.

I don't generally insist that people choose organic produce when cooking, but when it comes to herbs and spices there really is a huge difference! Spices will last up to 12 months when stored in an airtight container, so despite being a bit more expensive, you will still get bang for your buck. And did you read the Choice review that talked about the actual percentage of oregano that was in common/popular brands of herbs? Make sure you buy reputable brands such as Gourmet Organic Herbs or by bulk herbs online from Honest to Goodness or shops like Terra Madre (if you live in Melbourne).

This curry powder will make enough for 5-8 curries (depending on how strong you like your curry) and will last approximately 12 months in an airtight container.

In a bowl, combine:

  • 4 tsp cumin ground cumin

  • 4 tsp ground coriander

  • 3 tsp turmeric powder

  • 2 tsp mustard powder

  • 1 tsp cardamom powder

  • ½ tsp ground cinnamon


Place in an airtight container and store away from heat and direct sunlight.

Homemade SLAP (LSA)

LSA.jpg

Add some extra nutrition to your muesli, smoothie or salad with the help of SLAP. It takes less than 5 minutes to make, stores very well in the fridge, and is less expensive to make than buying packaged LSA.

What is SLAP?

SLAP is an acronym for Sunflower Seeds,  Linseed, Almonds & Pumpkin Seed. It's much like LSA but contains added zinc from the pumpkin seeds (bonus!). SLAP/LSA is powerhouse of minerals, healthy fats and fibre. This means this simple nut & seed blend can improve your bowel function, brain function, muscle repair and bone health.

Why Does LSA Need to Be Refrigerated?

LSA or SLAP contains omega 3 fatty acids with can easily oxidise if kept at a warm temperature. A cool and stable fridge temperature can help to keep the fats stable and keep all their anti-inflammatory health qualities.

How Should I Use SLAP/LSA?

There are lots of ways you can use this nutrient-rich blend. Here are some ideas for how to incorporate it regularly into your diet:

  • Sprinkle over muesli
  • Add a tablespoon to your smoothie
  • Scatter over a salad
  • Add a tablespoon to pancake/pikelet mixture
  • Throw some on you porridge
  • Add a tablespoon to baked goods to boost nutrition

Ingredients

  • 2 tablespoons of sunflower seeds
  • 2 tablespoons of almonds
  • 2 tablespoons of linseeds (flaxseed)
  • 2 tablespoons of pumpkin seeds (pepitas)

* We recommend you source organic raw ingredients where possible to increase the healthy fat content of these seeds/nuts.

Equipment

  • You will also need a high powered food processor or coffee grinder.
  • Glass jar for storage

Method

  1. Throw all ingredients into your food processor.
  2. Process on high speed for approx 3-5 minutes until all the seeds and nuts are broken down into a course flour-like consistency and not large chunks remain.
  3.  Store in a glass jar in the fridge for 3 months.


Chicken Bone Broth

Chicken-Bone-broth.jpg

Beautiful gut healing bone broth is simple to make, contains lots of nutrients and tastes delicious as it adds depth of flavour to your meals. 

After roasting up a chicken (usually delicious turmeric roasted chicken) I'm left with the carcass and gristle. All I do is throw it in the pot with some herbs and leftover veggie scraps and boom - delicious bone broth is ready to add to my next soup, casserole or even cook some legumes or rice in. 

Just adapt the recipe to whatever herbs or spices you have on hand to make the whole processes even easier.

Why Bone Broth? 

Making bone broth is a wonderful way to extract the amino acids glycine, proline and glutamine from the collagen in a chicken carcass. Collagen is found in the tendons, ligaments and skin in animals - and is especially abundant in chickens. These amino acids are the building blocks of proteins found in cells in the body. Glutamine and gelatine found in bone broth is especially helpful at healing the lining of the digestive tract. 

Bone broth also contains many minerals and electrolytes including calcium, magnesium, potassium and sodium. These nutrients help to regulate fluid homeostasis in the body, provide cofactors for bone health and neurotransmitter production to regulate mood.  

Why Organic?

You will hear Renee and I talk about this a lot at Westside. When consuming meat it is important that you are choosing organic or biodynamic meat wherever possible.

Conventionally-raised animals are fed diets of grain and grasses that are sprayed with toxic herbicides and insecticides such as organophosphates (a known neurotoxin and suspected carcinogen). These chemicals are retained in animal tissue and not readily excreted meaning that when you eat a diet rich in conventionally-raised livestock you are also consuming these stored toxins.

Whenever possible also prioritise consumption of organic and biodynamic meat. 

A Word of Warning

Bone broth is not for everyone. It is high in sodium and potassium so people with impaired kidney function or hypertension should err on the side of caution by consulting a healthcare professional before adding this into their regular diet. 

Ingredients

  • All the bones from a roasted organic or biodynamic chicken
  • 1 tsp apple cider vinegar
  • 6 black peppercorns
  • Handful of fresh or dried herbs: oregano, sage, parsley, thyme, rosemary etc...
  • Handful of veggie scraps: onion skins and tops, zucchini or carrot ends, celery sticks etc...
  • 1 tablespoon dried or fresh ginger or turmeric
  • 3.5L of filtered water
  • Pinch of sea salt (optional)

Method

  1. Add all ingredients to your stock pot or slow cooker. Allow to sit for 20 minutes for the apple cider to take affect and help the bones and cartilage to break down.
  2. Place the pot on the stove or in the oven and turn to the lowest possible heat. Alternatively set your slow cooker to low. Ensure the lid is properly covering your pot to prevent evaporation.
  3. Cook for 8-12 hours, checking every hour or so that the liquid has not cooked off. Ideally the pot should be bubbling very slowly.
  4. After 8-12 hours the ends of the chicken bones should crumble under slight pressure. This is when you know it is done.
  5. Strain with a muslin cloth or clean tea towel once the liquid is cooled.
  6. Store in glass jars. 

Bone broth lasts about 1 week when refrigerated or 3 months when frozen. 

Bone-broth.jpg

Scraps Stock Paste

veggie stock paste.jpg

Ever since I got my thermomix, I haven't had to buy stock paste or powder because I've been making my own, and its been awesome! Aside from being free from sugar, preservatives and additives, it's primarily made from veggie scraps which means less waste or more veggies in my family's diet, win win!

I generally use my thermomix but wanted to write up a recipe that even non-thermomix users could use. I keep all my veggie scraps (things like veggie peels, carrot and zucchini ends, bits of celery, broccoli and cauliflower stalks) in a container or freezer bag in the freezer until I have enough to make up a good batch of stock. I chop it all up, chuck it in a pot and voila, 20 minutes later I have a big pot of stock paste!

Due to the salt content, it will last 2-3 months in the fridge, I usually freeze half in ice cube trays and keep the other half in the fridge. 1 ice cube of stock equates to roughly 1 tablespoon. The ingredients are rough estimates, based on what you have on hand. If there's intolerances, you can omit the onion, garlic and leeks, but the essentials are definitely celery and fresh herbs. You can also omit the salt, but you will need to freeze it immediately as the salt is needed to preserve the paste.

cooking scraps stock.jpg

Ingredients

  • 3 leeks (you can use the tops but they can be a bit bitter)
  • 1/2 celery bunch, or equivalent celery scraps
  • 1/2 bunch parsley
  • small handful fresh oregano
  • 4 cloves of garlic
  • 1 carrot
  • 1 onion
  • 1/2-3/4 bag of frozen or fresh veggie scraps (you don't need to defrost these)
  • 1/2 cup good quality salt (I use Mount Zero pink lake salt)
  • 2 tbs extra virgin olive oil
  • couple of cracks of pepper

Method

  1. Rinse all the veggies and fresh herbs and roughly chop
  2. Place in a large pot, with the salt, olive oil and pepper and cook over a medium heat
  3. Cook for 20 or so minutes, stirring regularly
  4. Allow to cool for a minute or two, then transfer to a food processor (you could also use a stick mixer to blend it in the pot) and process until smooth
  5. Spoon mixture into ice cube trays and place in the freezer, or a jar for the fridge. If you have a dehydrator, you can also dehydrate the paste (approx 30 hours on low) then process into a powder.
scraps stock jar copy.jpg